Pictures from just a few of our past projects
Click on any photo for a larger view
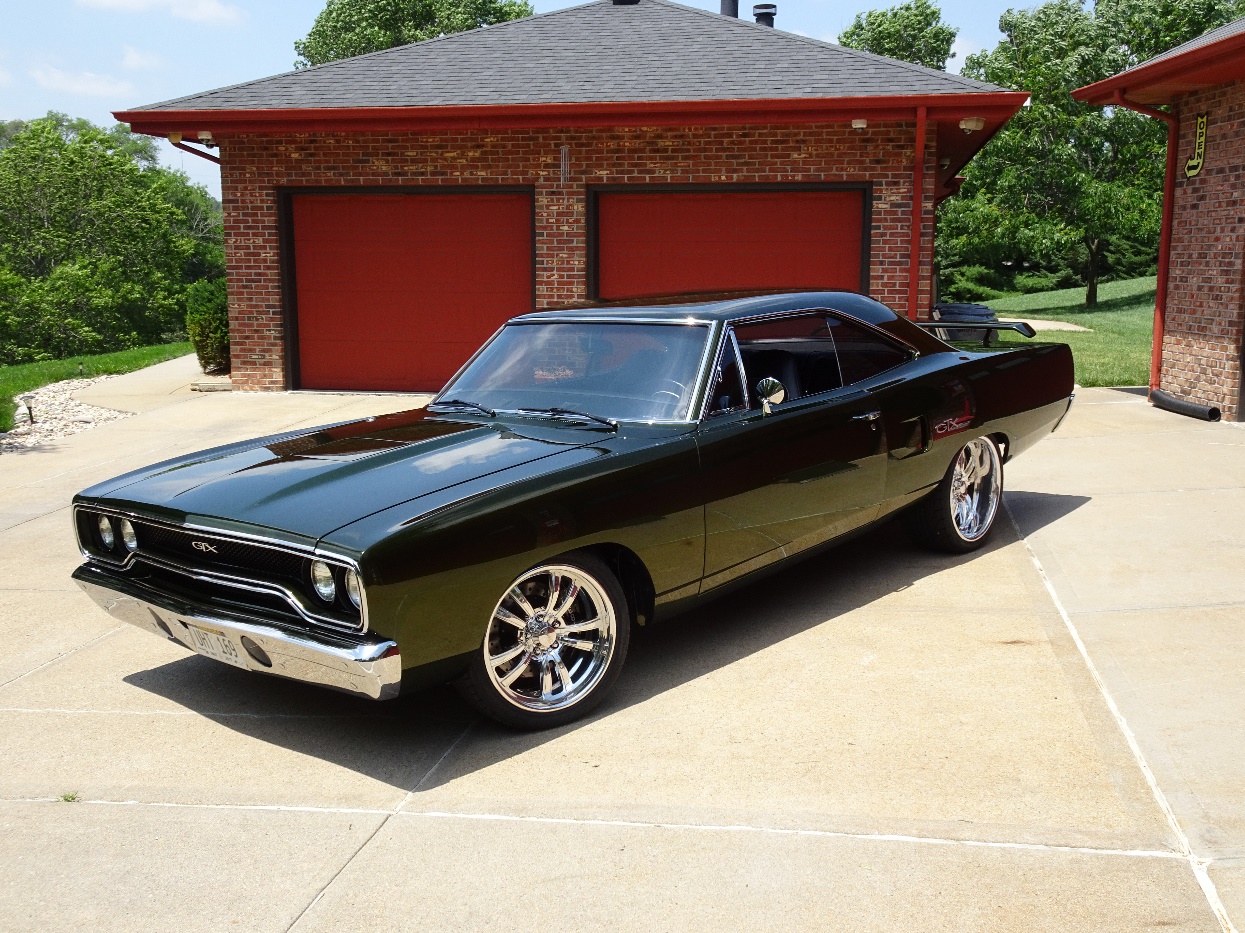
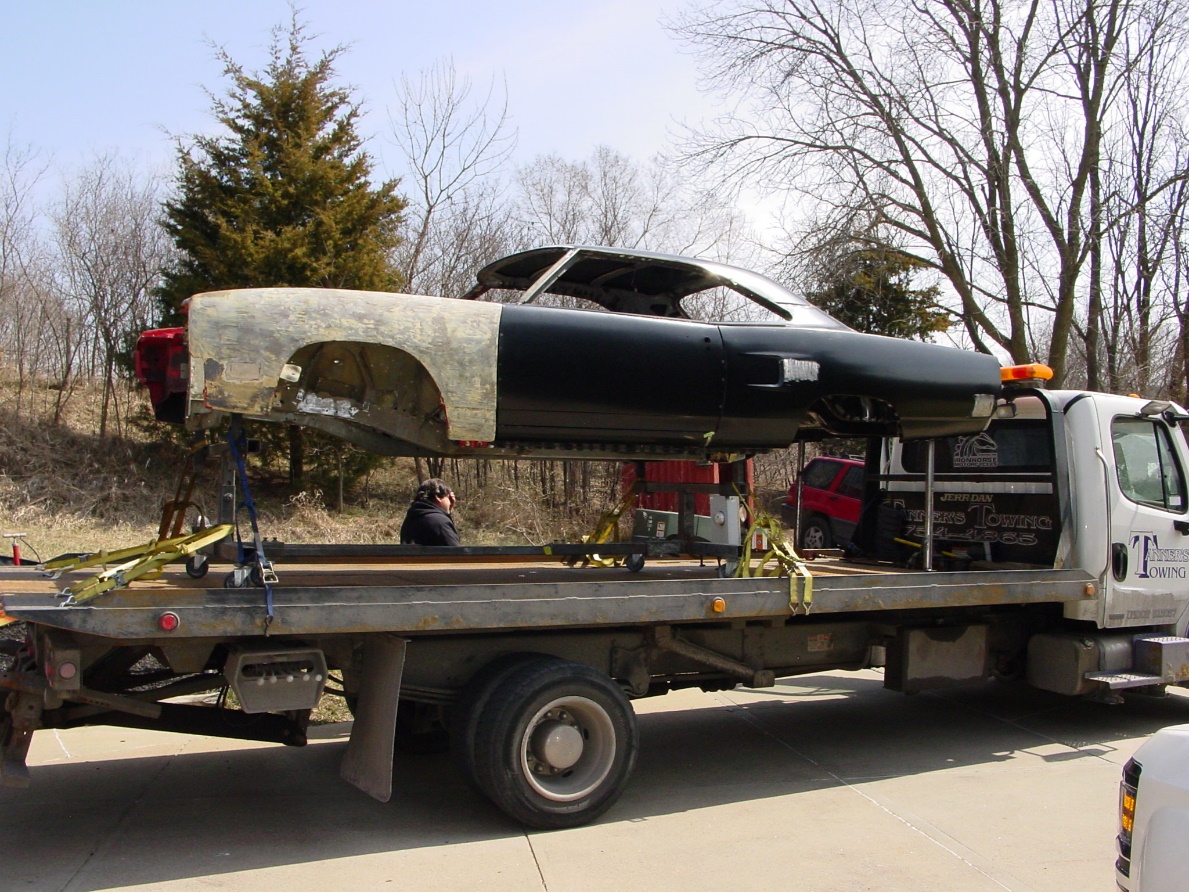
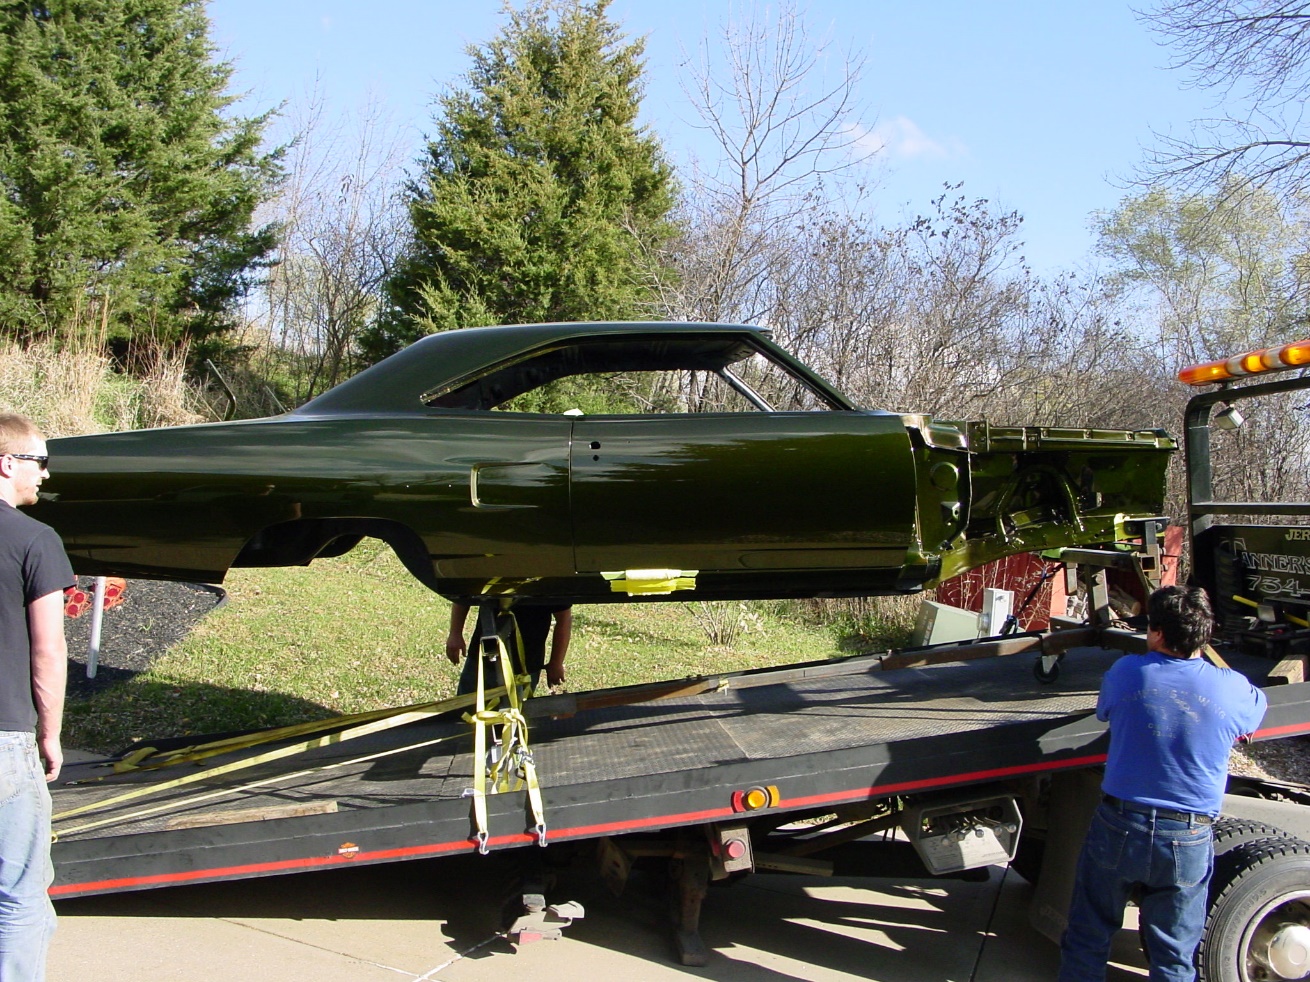
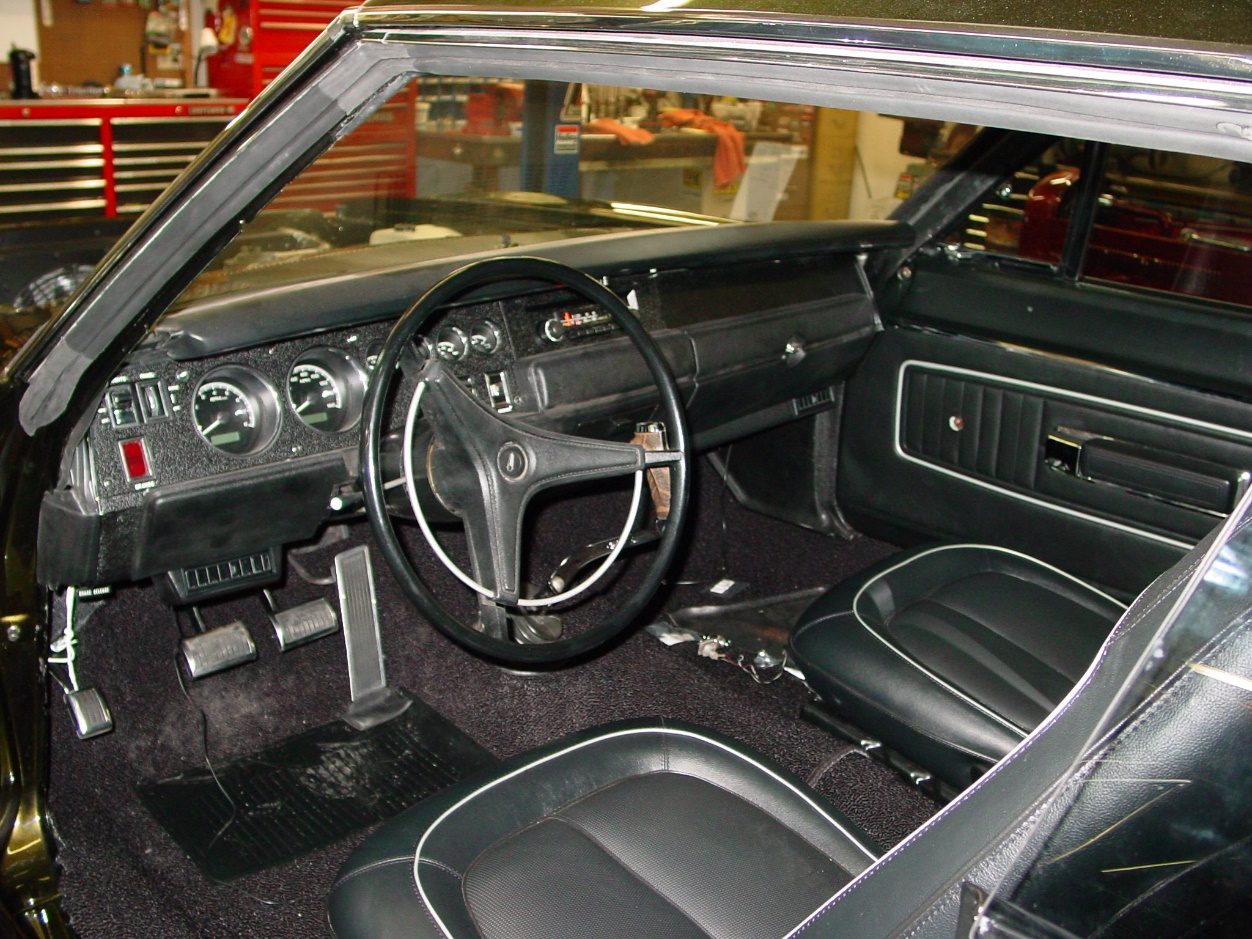
1970 GTXAn original 1970 440 6 pack, 4 speed, track pack GTX that was purchased as a newly restored vehicle at Barret Jackson, Scottsdale.As typical with auction cars it was delivered to the new owner with several deficiencies. Some of which were immediately apparent while others were deeply hidden under the glitter of the new restoration.While the initial issues were being addressed others that were deeply hidden began to appear. The most concerning was that the restoration had been poorly executed and replacement floors, rear frame rails, and quarter panels were improperly installed and severely out of alignment, so much so that the driveshaft was going through the floor tunnel at a severe enough angle to be rubbing on the RF inner seat belt bolt.While some people may have sent the car back to auction and resold it, the current owner chose to proceed with starting the restoration over and doing several upgrades along the way.Follow along as we rebuild this car from the ground up correcting issues that another left behind. |
 |
|||
 On to the rotisserie for paint stripping. On to the rotisserie for paint stripping. |
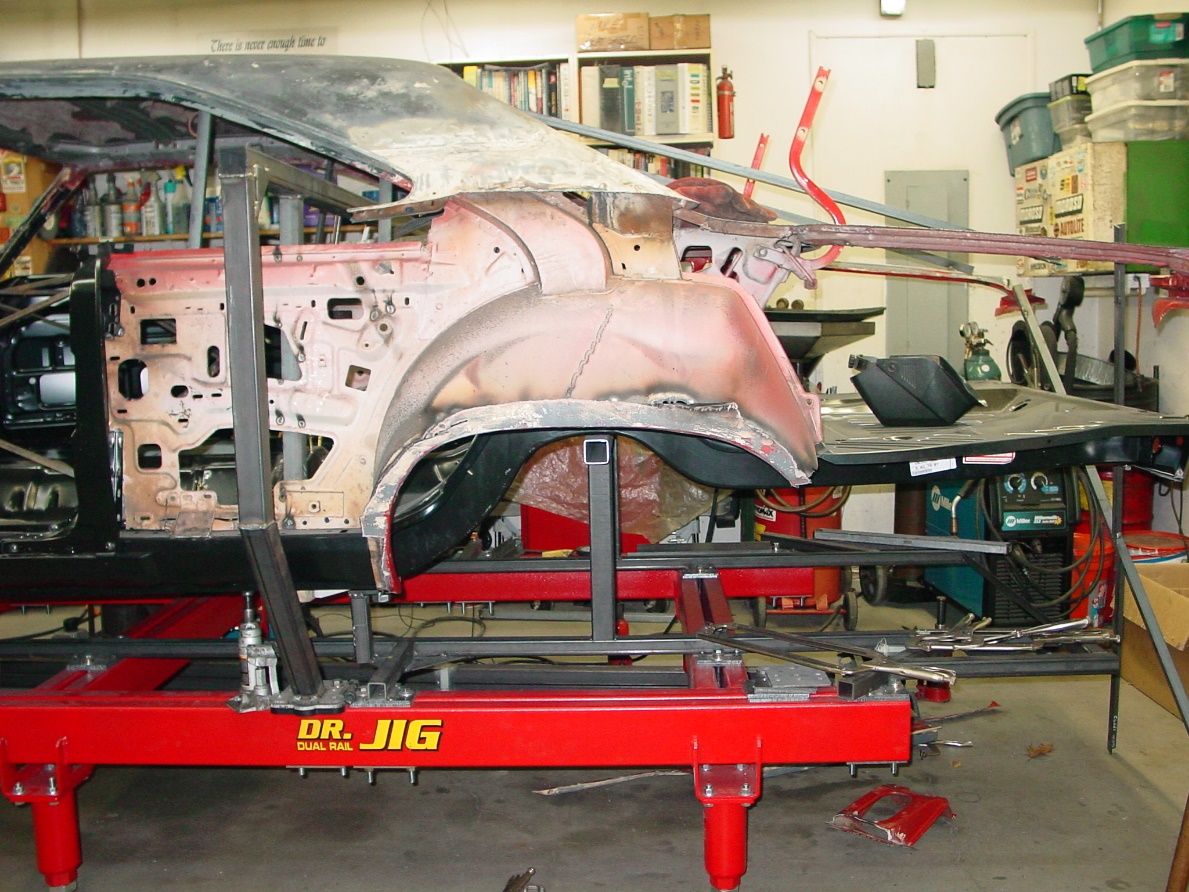
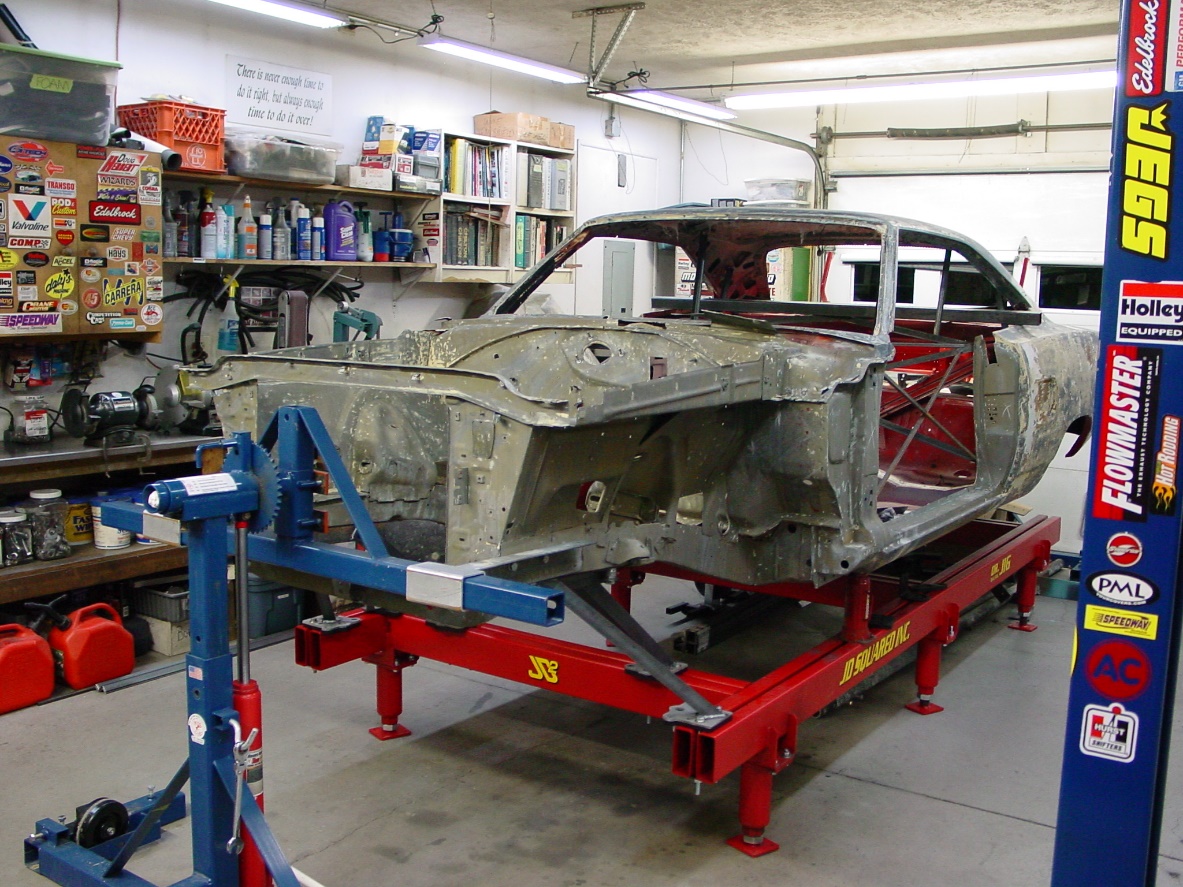 Mounting to the frame jig. Mounting to the frame jig. |
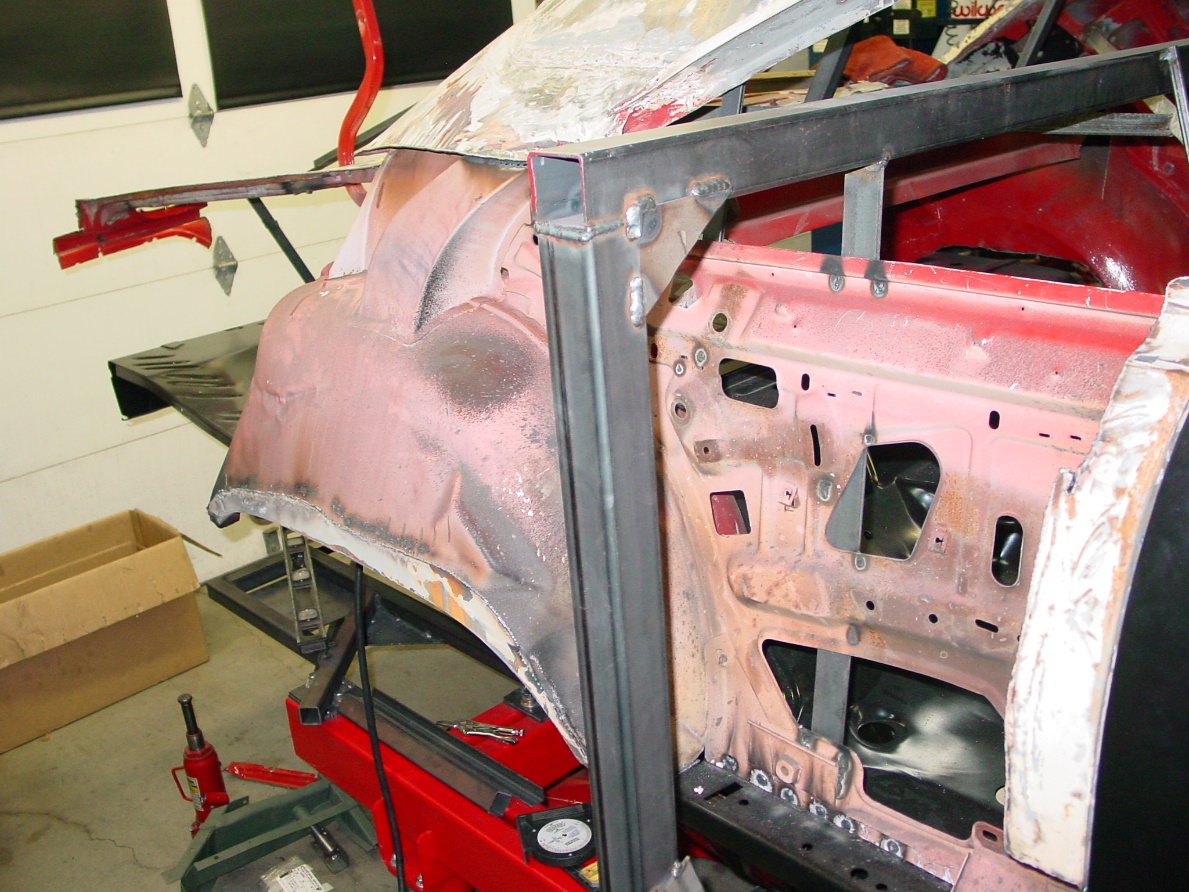
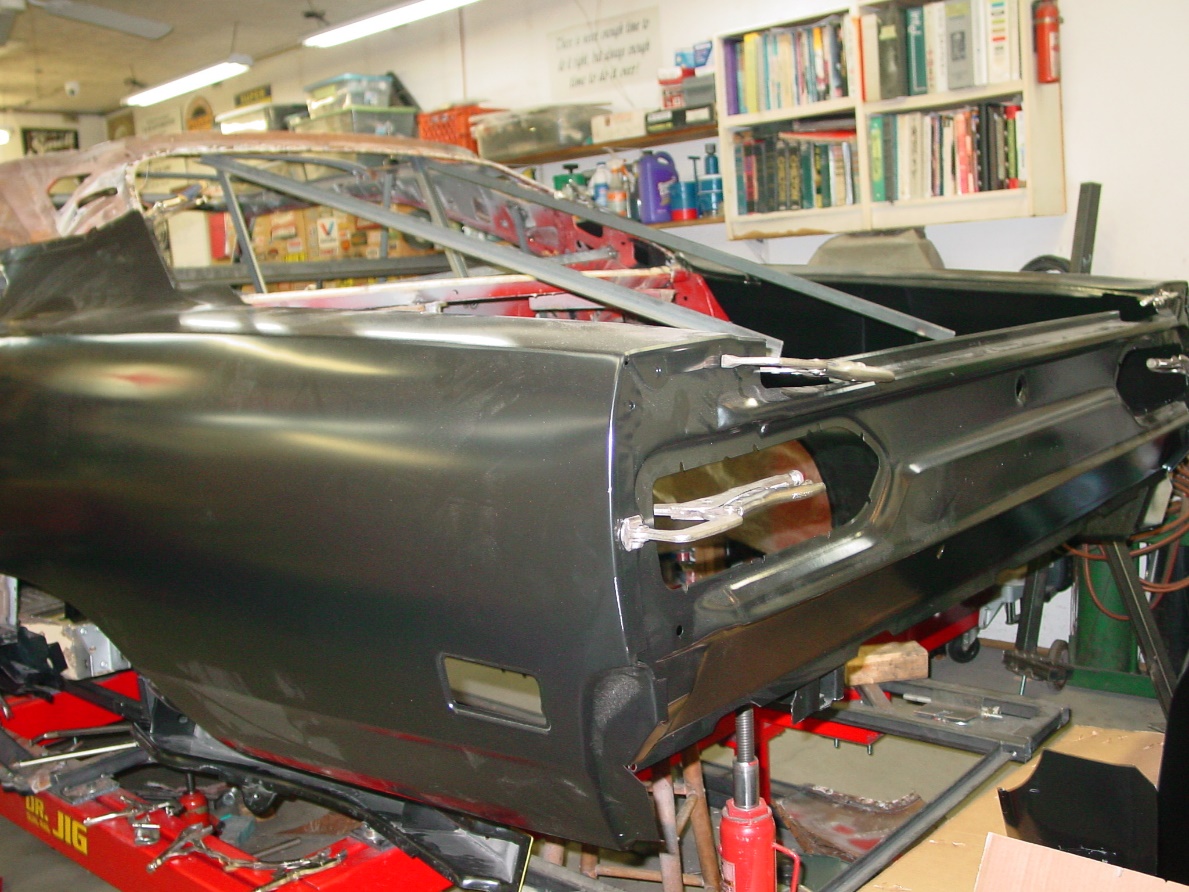
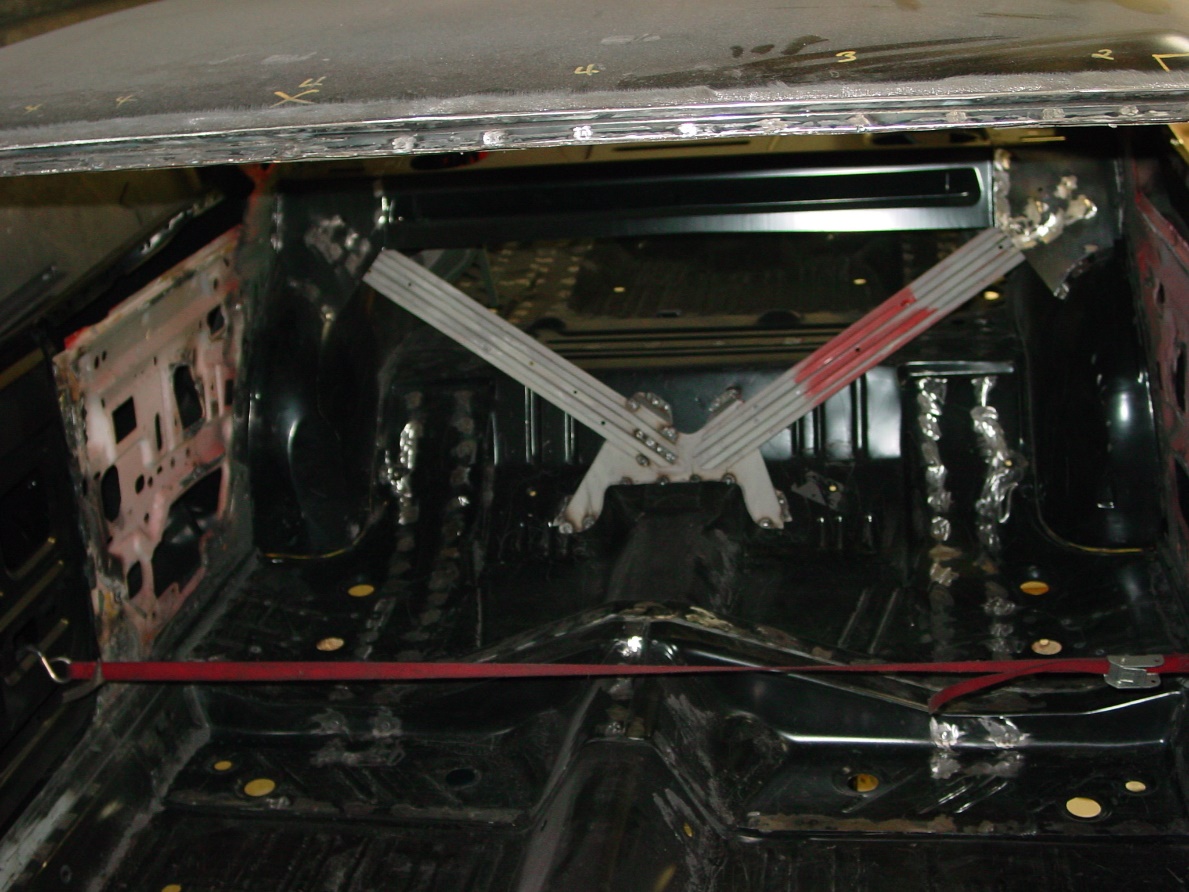
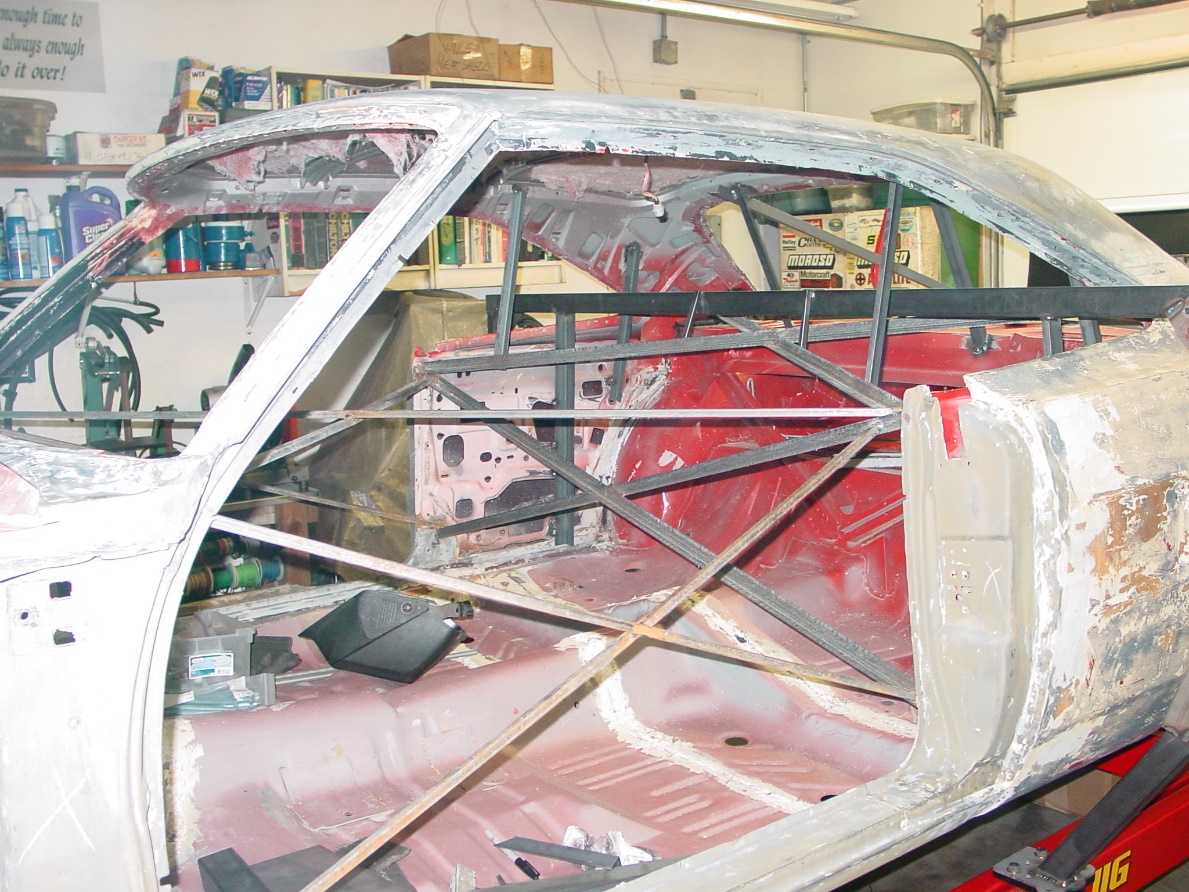 Reinforcing before panel removal to keep everything in line. Reinforcing before panel removal to keep everything in line. |
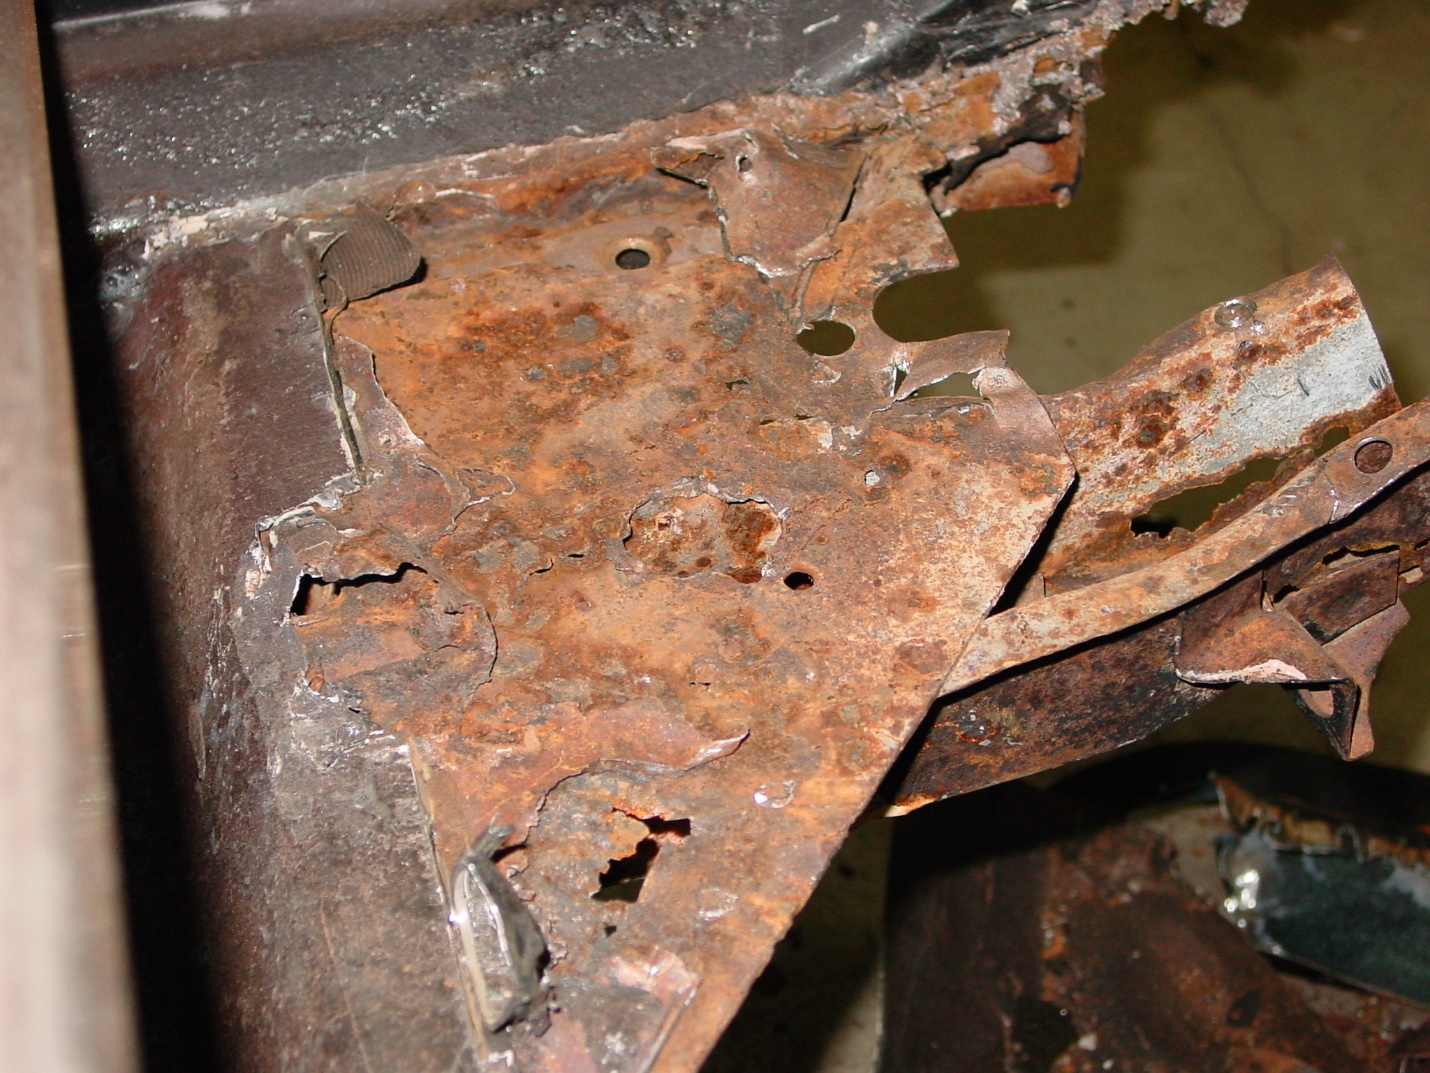
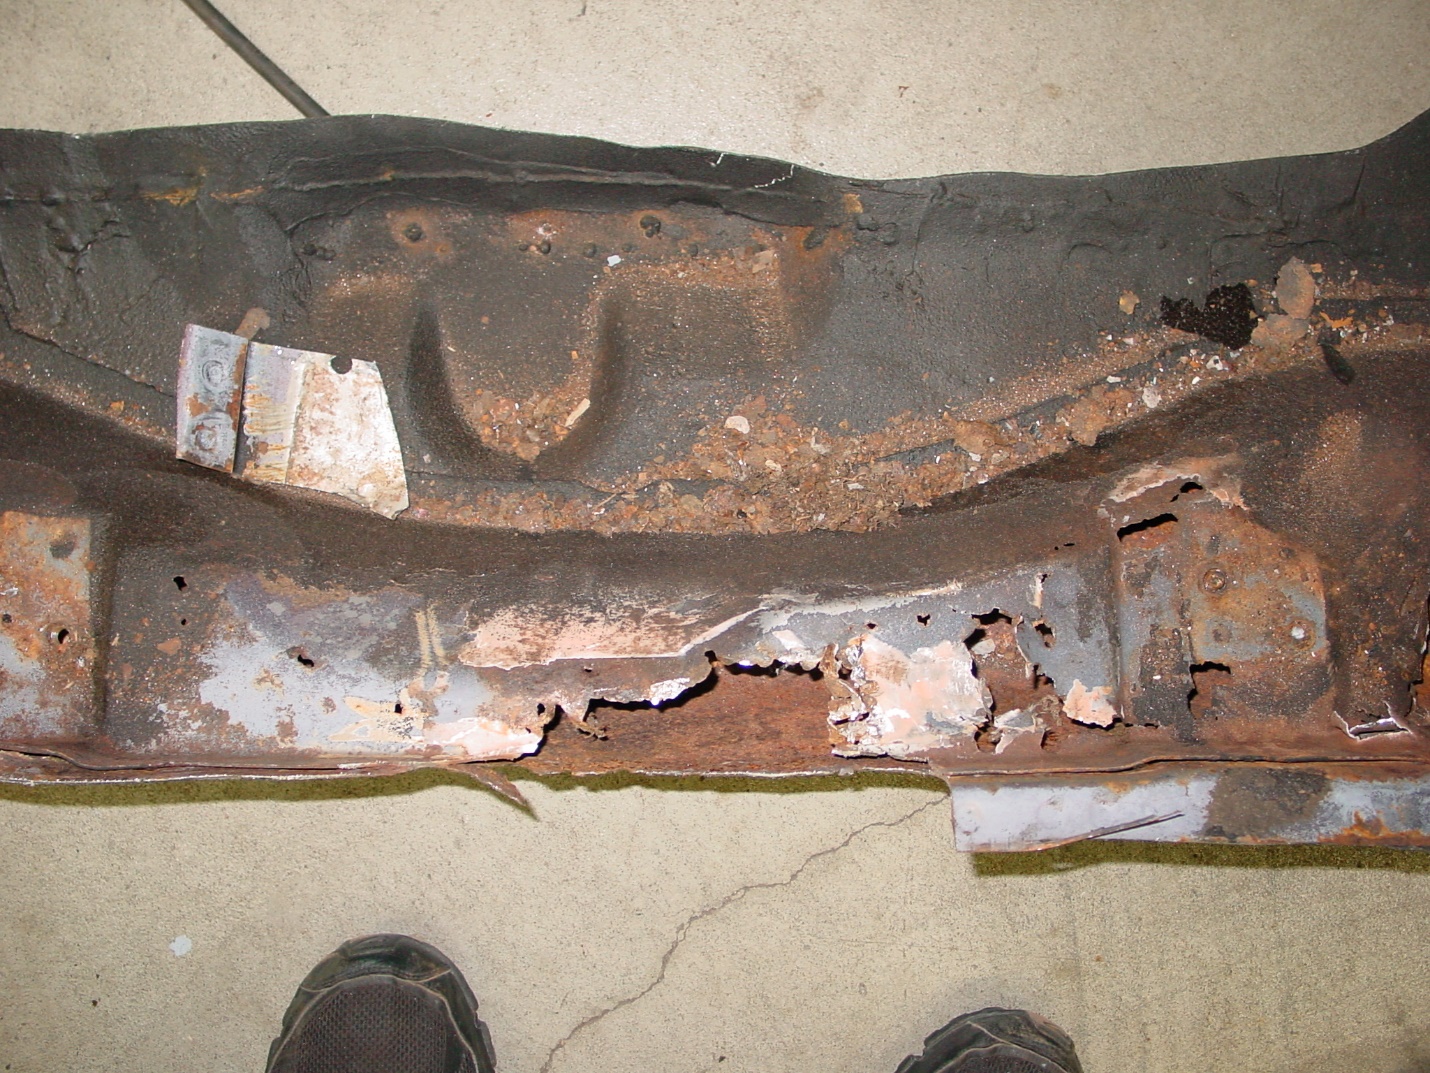
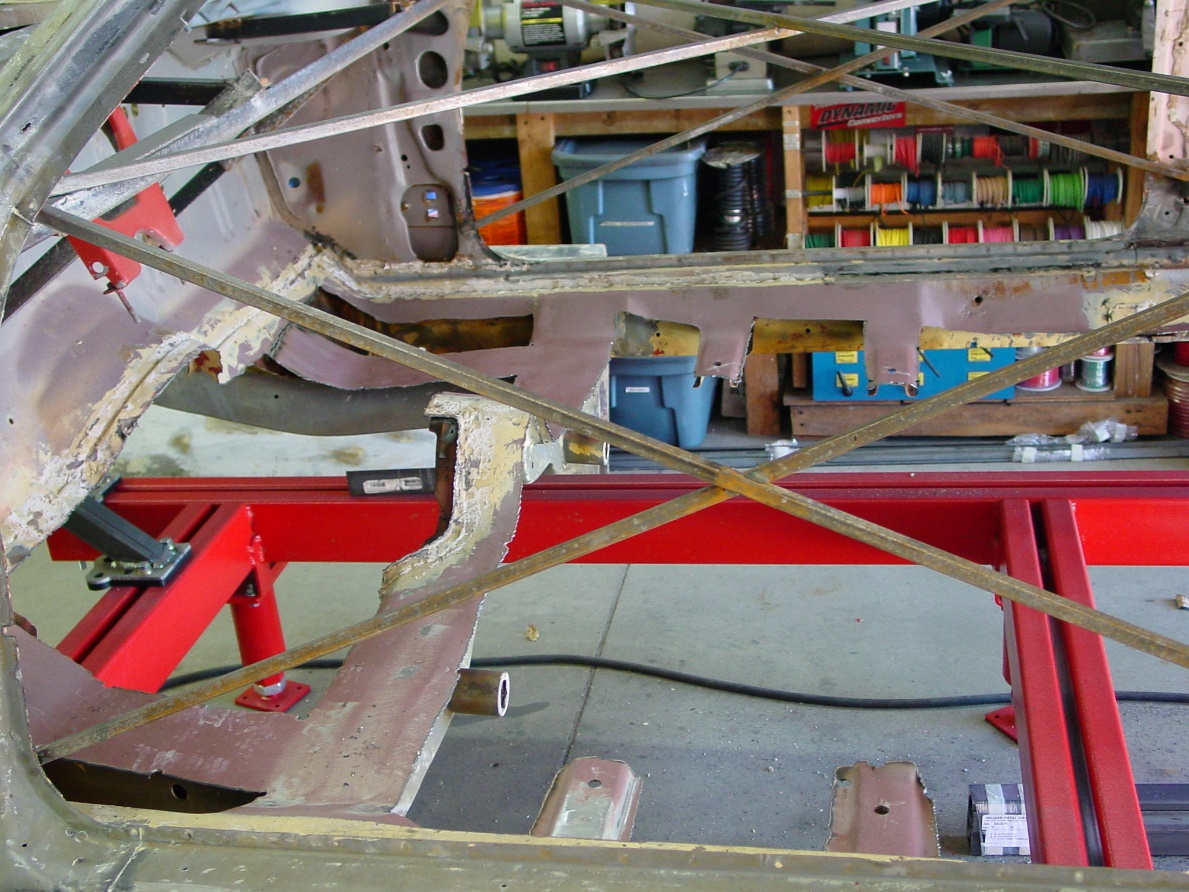 The floors have been removed.Can you say "Flinstone's" The floors have been removed.Can you say "Flinstone's" |
 New fresh air/cowl vent fabricated and installed. New fresh air/cowl vent fabricated and installed. |
 New cowl, front door pillar and inner rocker panel being fit. New cowl, front door pillar and inner rocker panel being fit. |
 LR ¼ panel off, Rear frame rail /floor being fit. LR ¼ panel off, Rear frame rail /floor being fit. |
 RR ¼ panel off, frame rail, rocker panel, floor being fit. RR ¼ panel off, frame rail, rocker panel, floor being fit. |
 Outer rocker, rear door pillar and ¼ panel being fit. Outer rocker, rear door pillar and ¼ panel being fit. |
 Rear sheet metal mockup / fitment looking good. Rear sheet metal mockup / fitment looking good. |
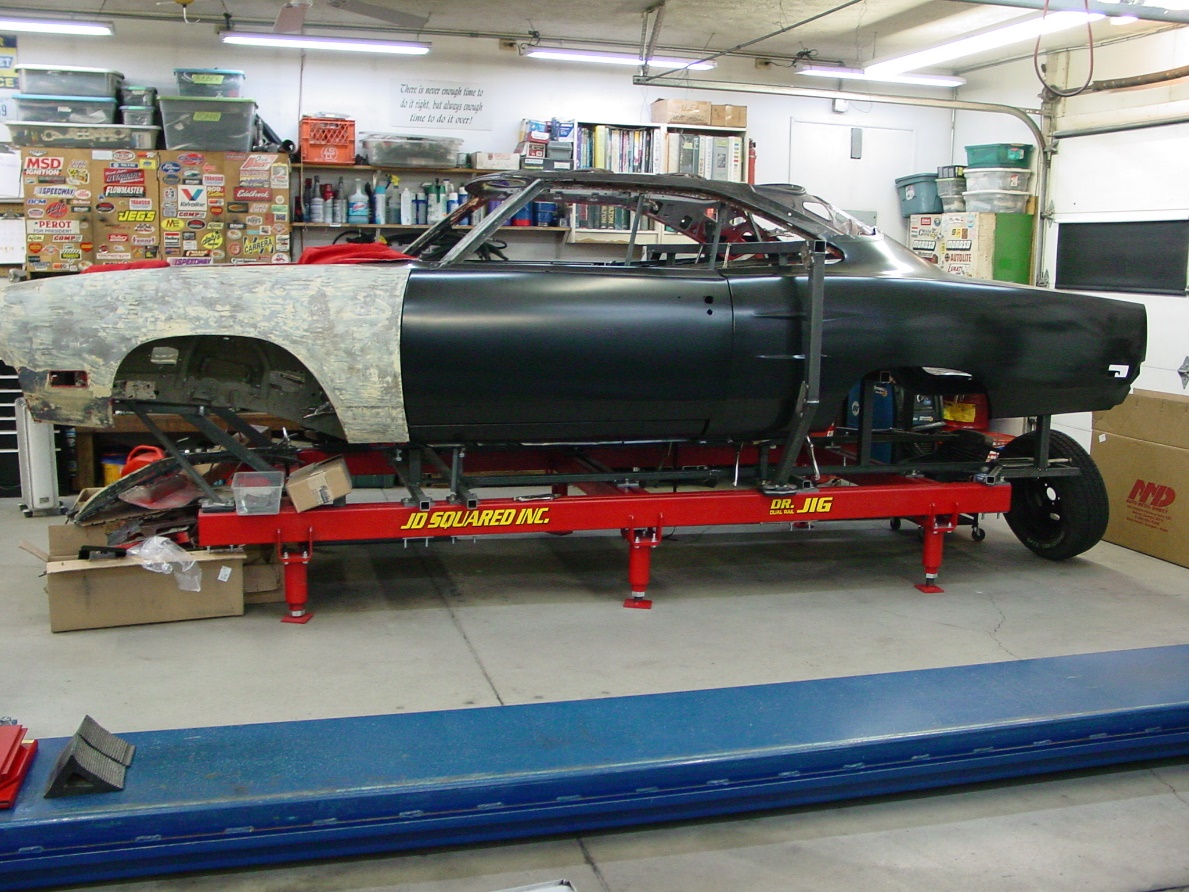 Starting to resemble a car again. Starting to resemble a car again. |
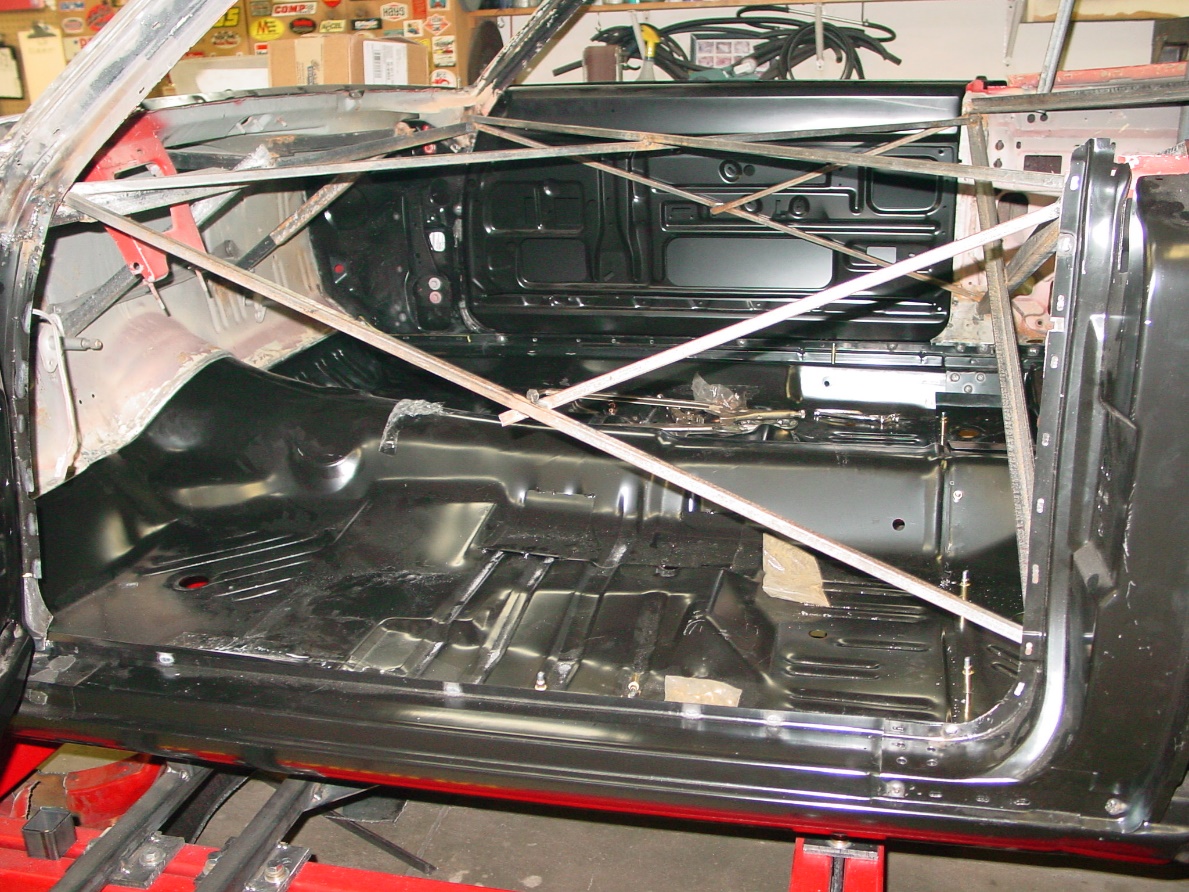
 Floor pans in and done. Floor pans in and done. |
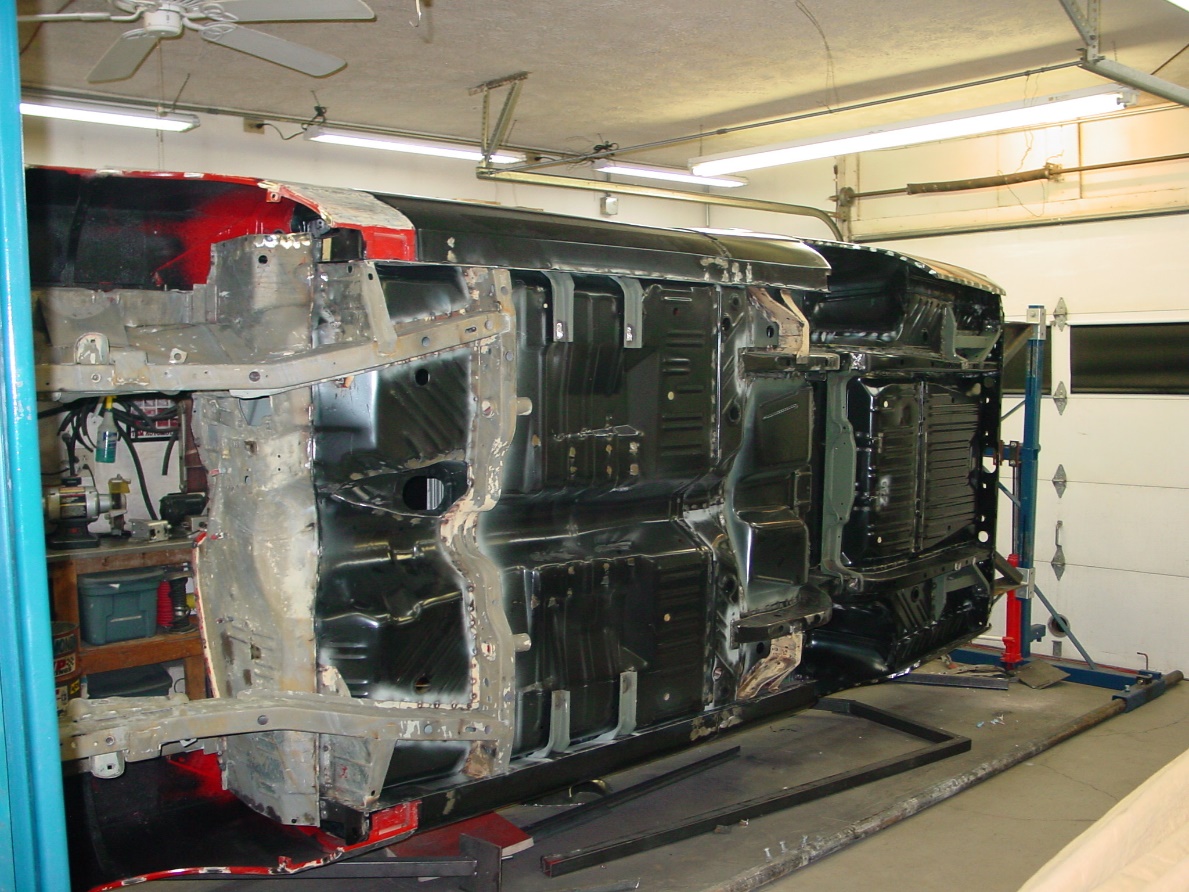 Replacement panels all done and welded in. Replacement panels all done and welded in. |
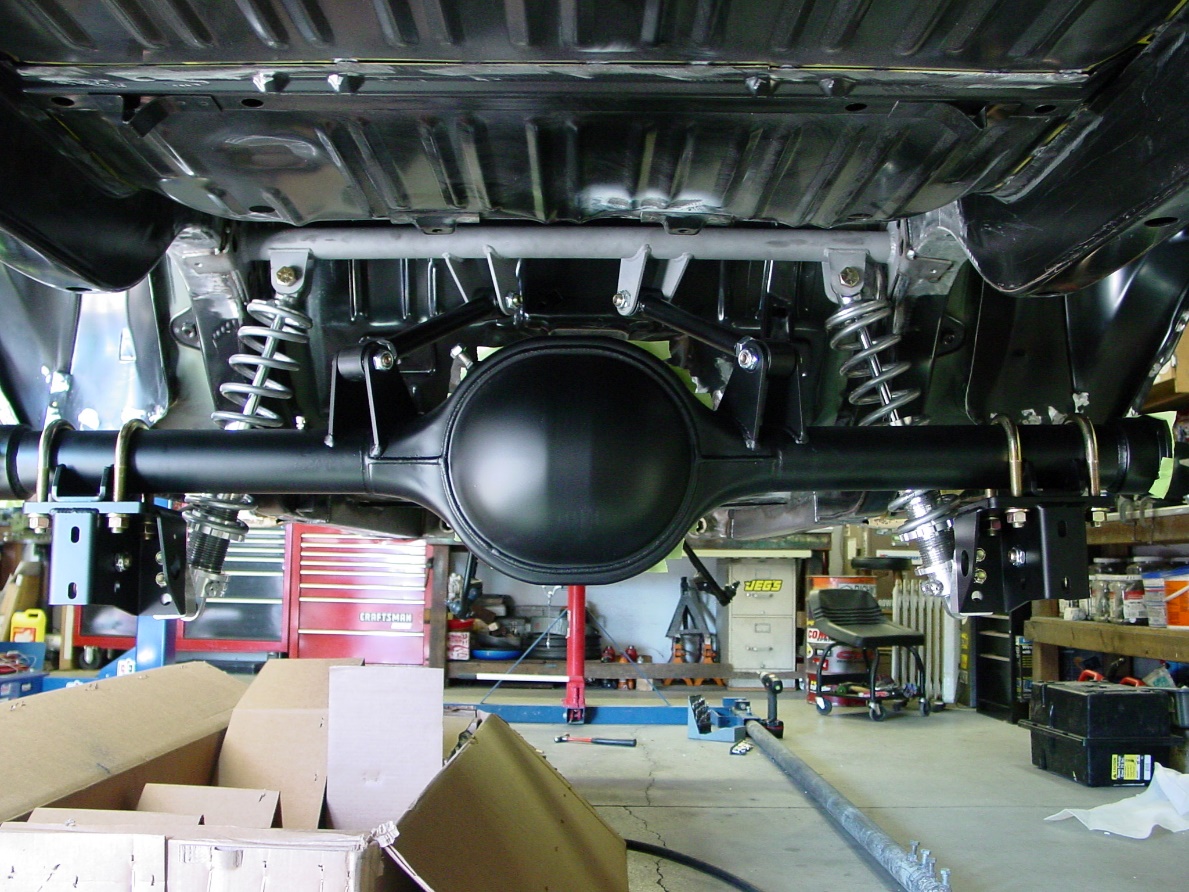 Trial fitment of the RMS rear suspension. Trial fitment of the RMS rear suspension. |
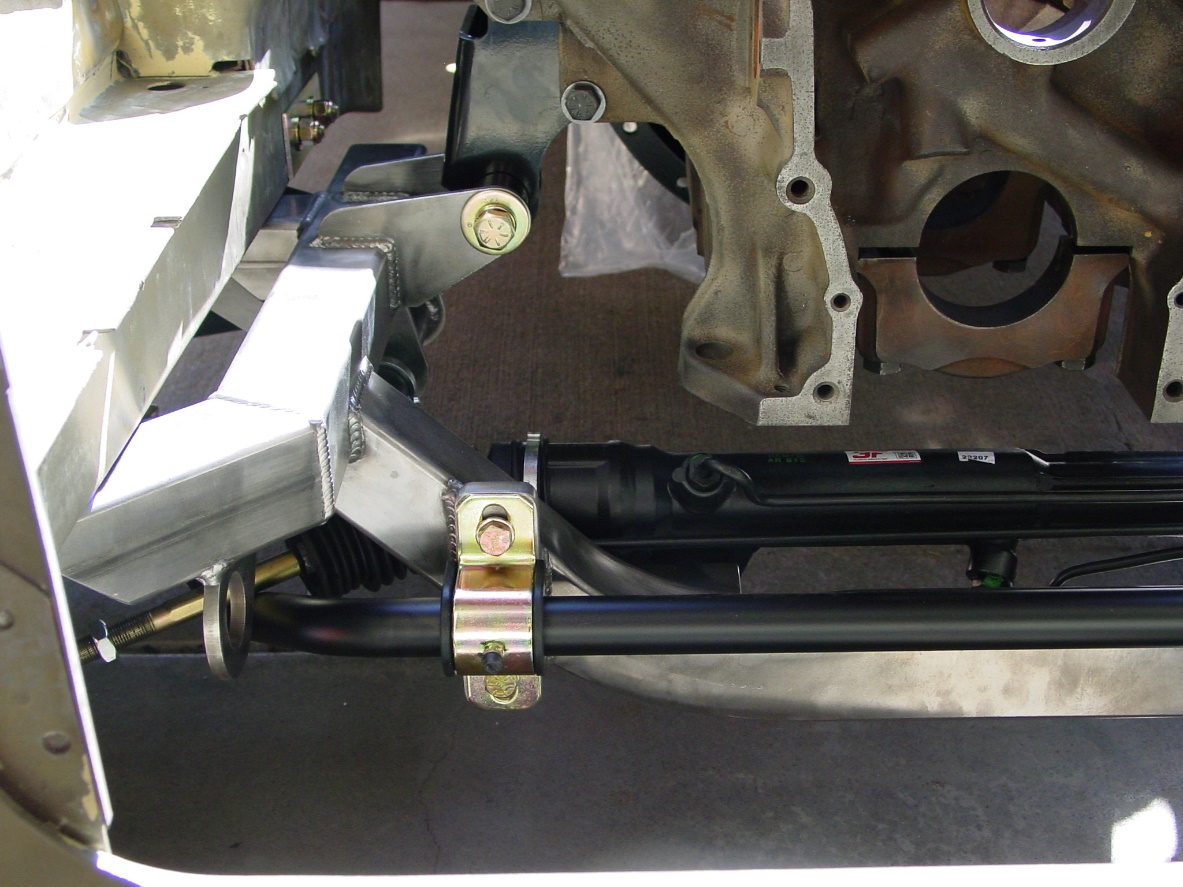
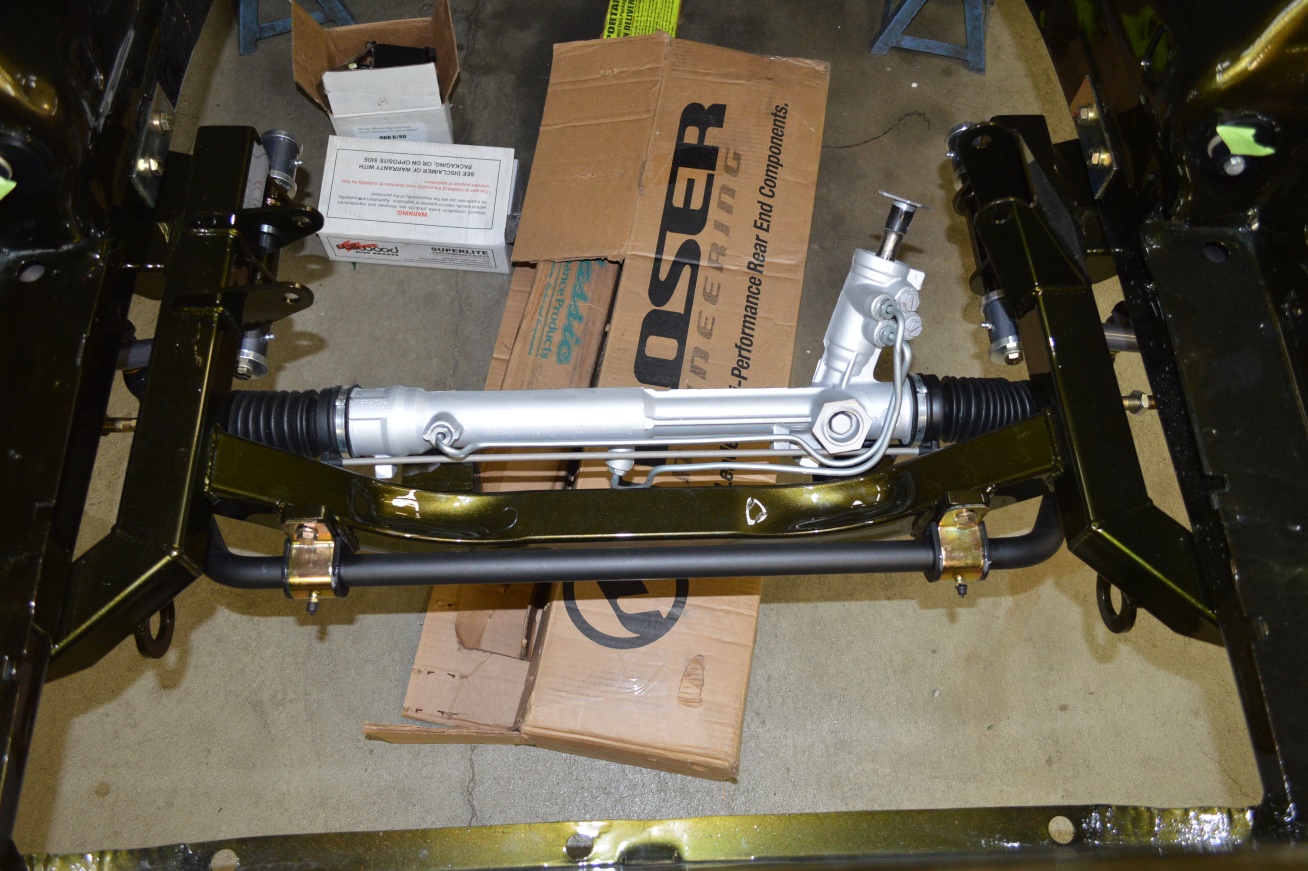
 Trial fitment of the RMS front crossmember. Trial fitment of the RMS front crossmember. |
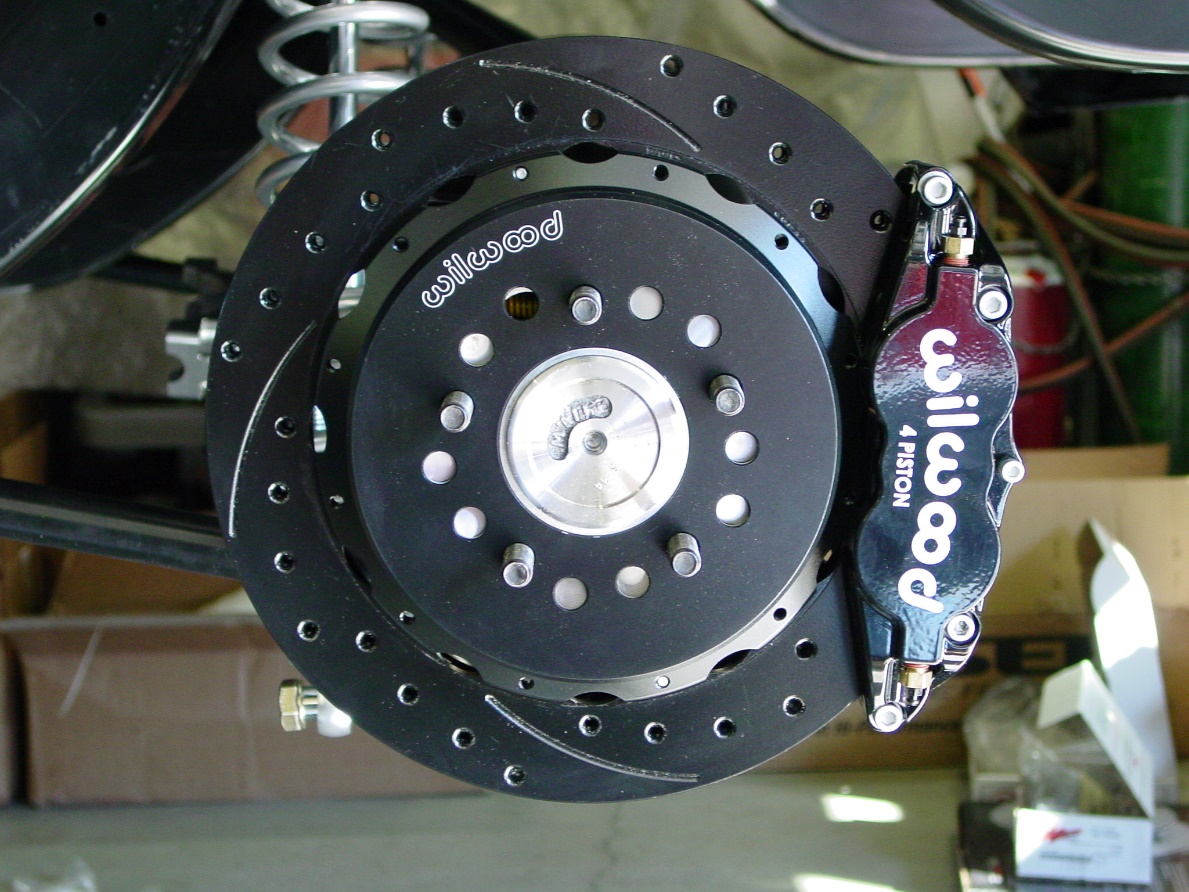
 Front suspension and brakes trial fit. Front suspension and brakes trial fit. |
 Rear suspension and brakes looking good :) Rear suspension and brakes looking good :) |
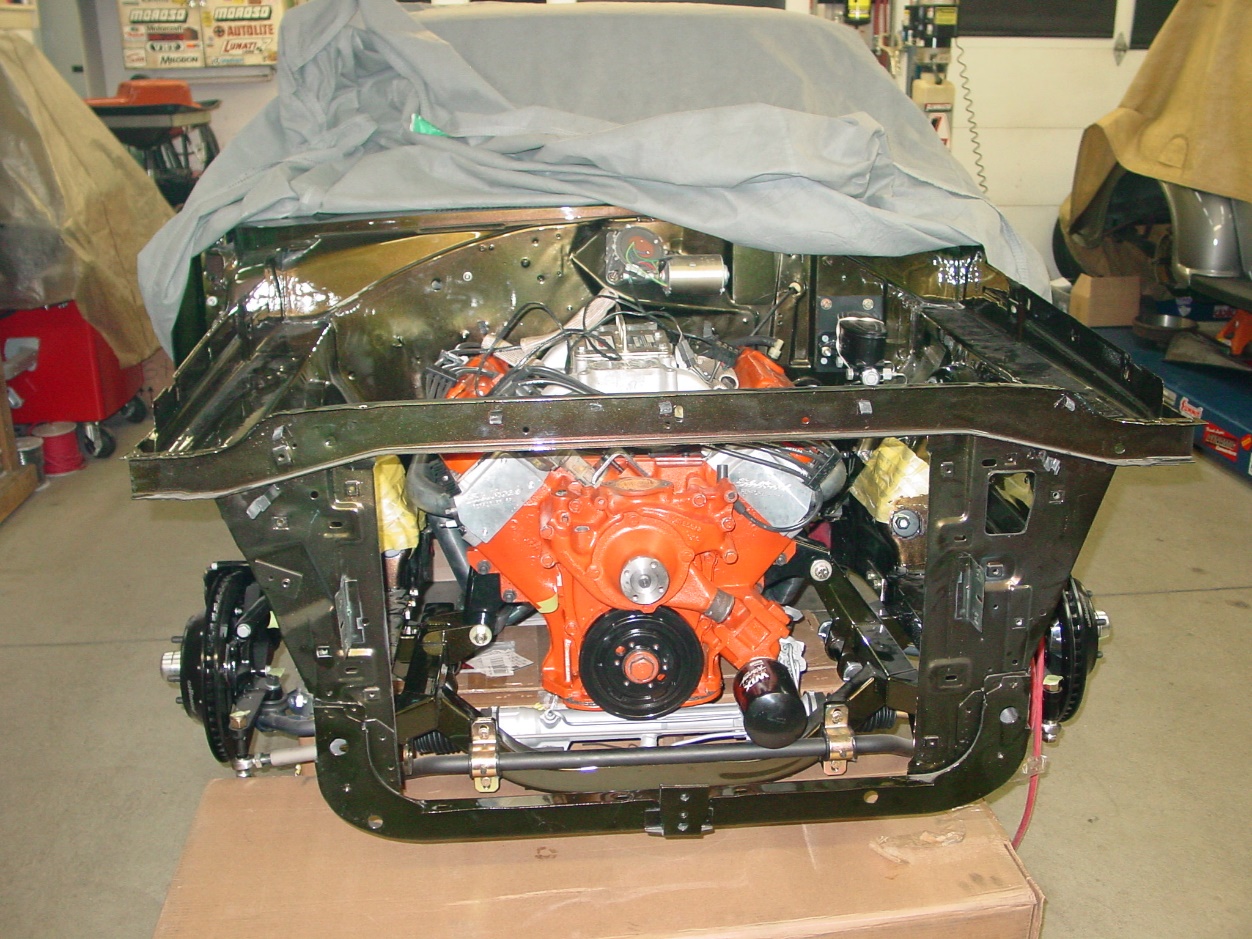
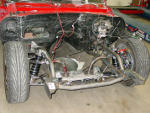
 Engine and Trans being trial fit L side. Engine and Trans being trial fit L side. |
 Engine and Trans being trial fit R side. Engine and Trans being trial fit R side. |
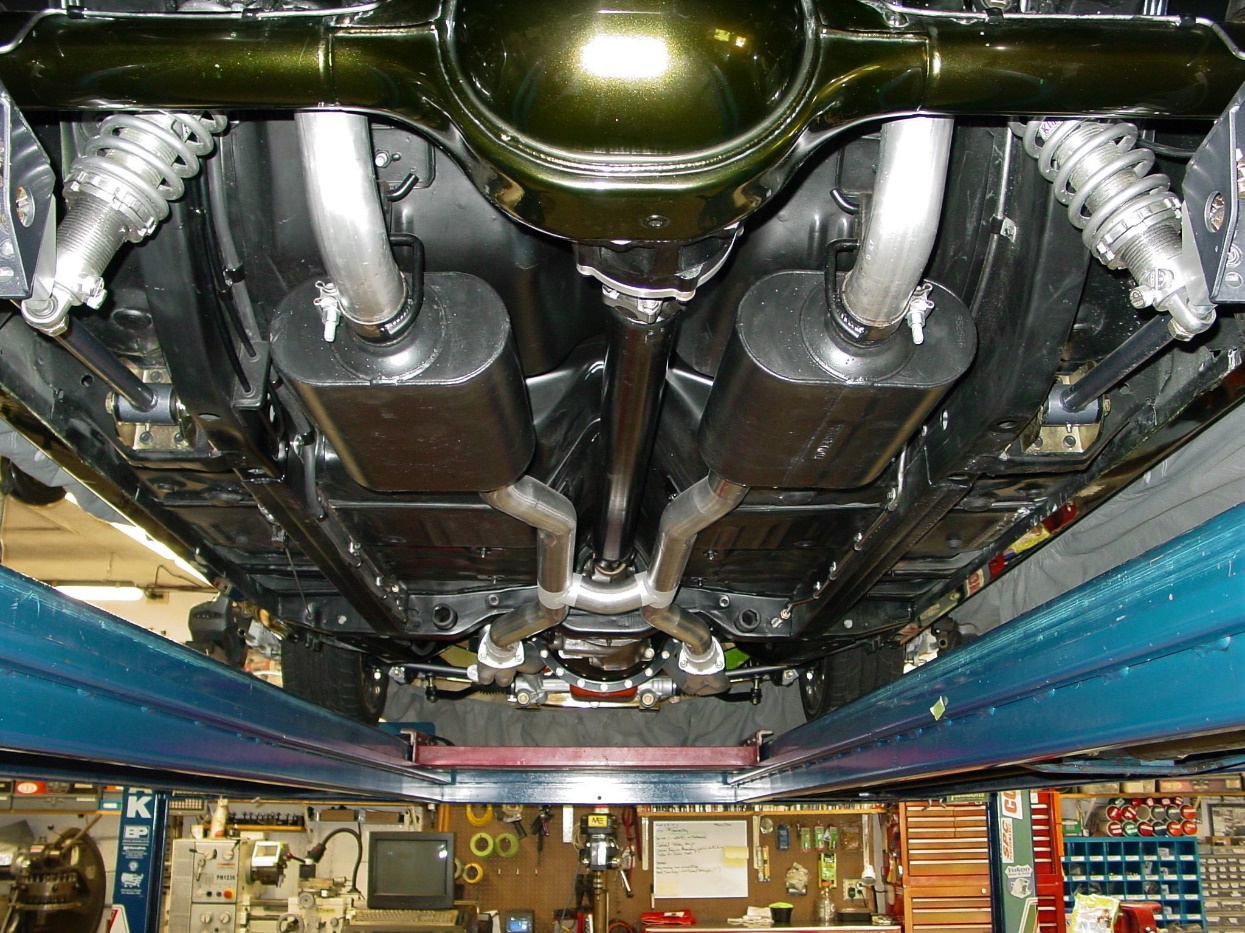
 Unlike before, the driveshaft is straight down the tunnel. Unlike before, the driveshaft is straight down the tunnel. |
 Shifter location looking good. Shifter location looking good. |
 After disassembly, off to the body shop for paint. After disassembly, off to the body shop for paint. |
 While off at the paint shop other items get addressed. Hmm, a poor fitting seat cover, wonder why? While off at the paint shop other items get addressed. Hmm, a poor fitting seat cover, wonder why? |
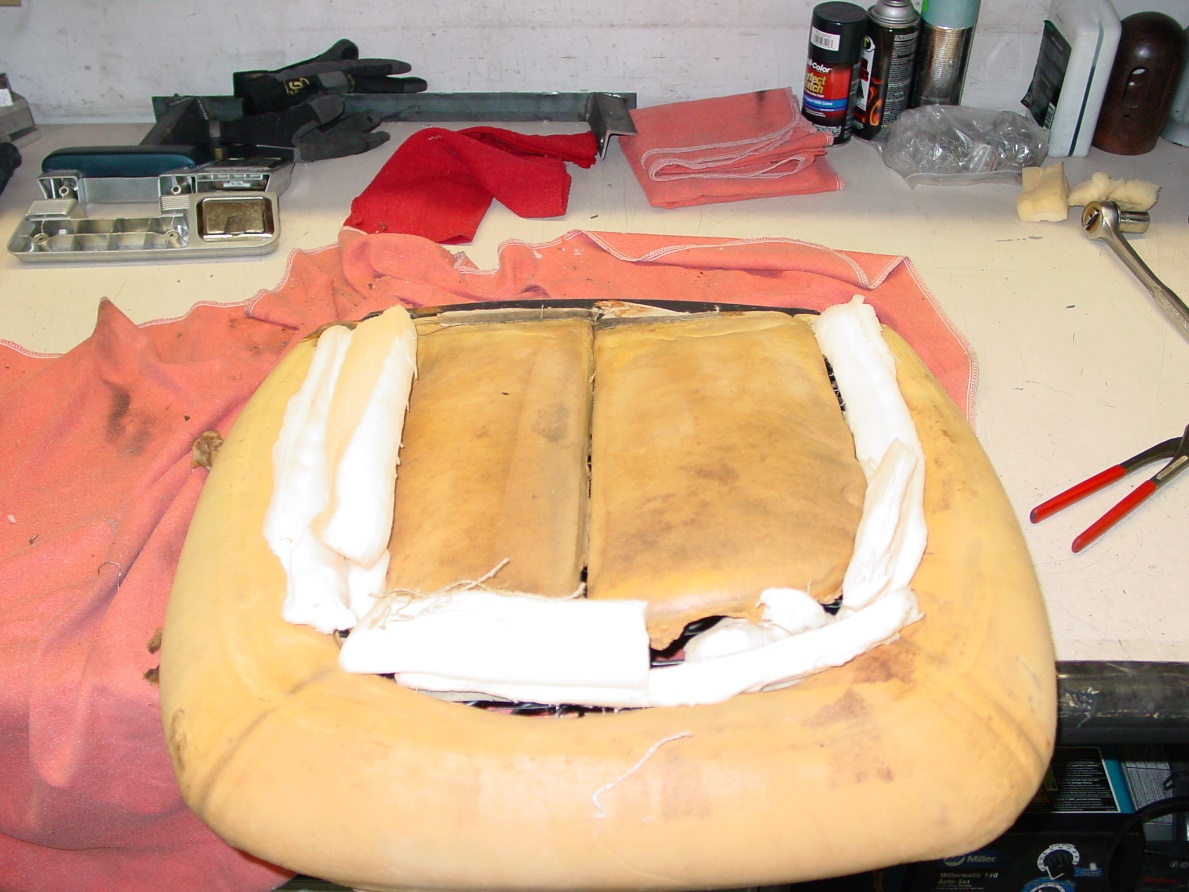 Here we have the reason for the poor fitting seat covers. Here we have the reason for the poor fitting seat covers. |
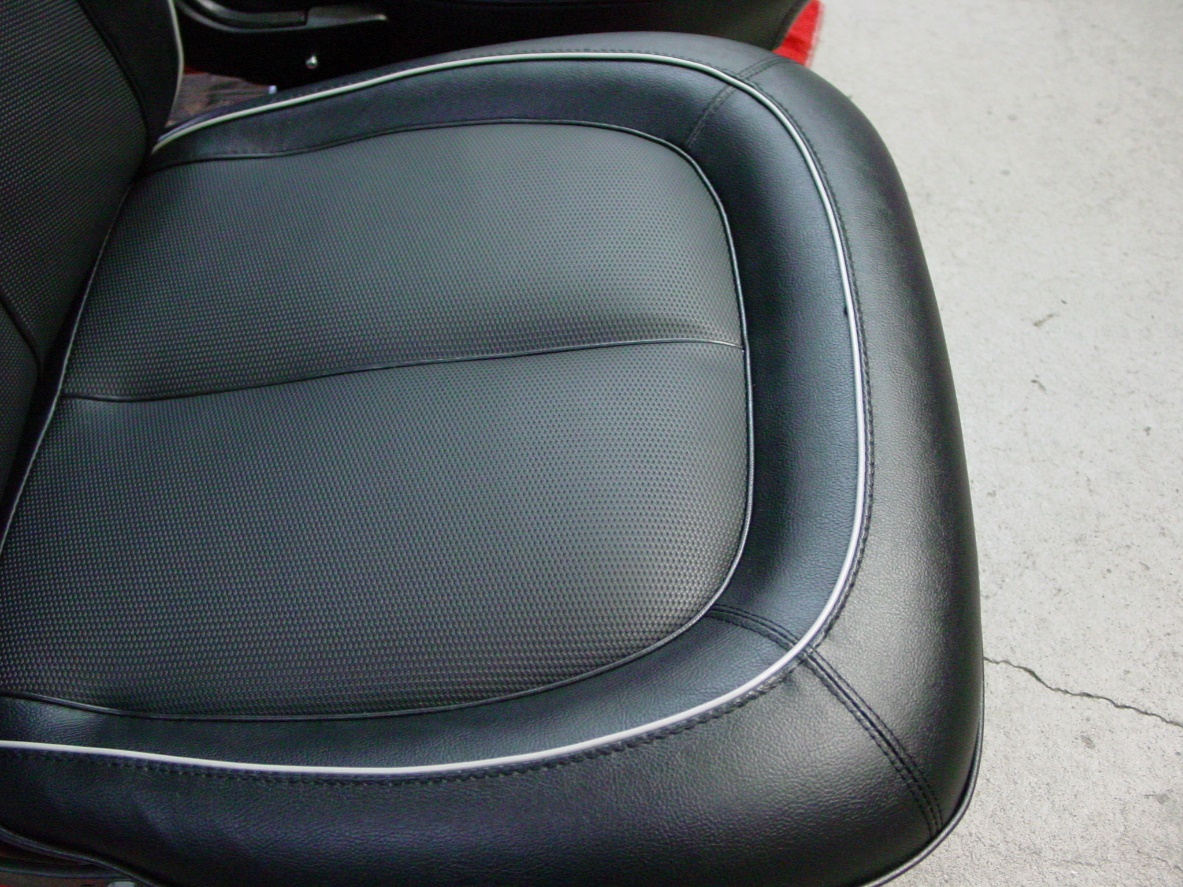 After rebuilding, new springs, foam and covers. Much nicer. After rebuilding, new springs, foam and covers. Much nicer. |
 Before shot Before shot |
 Afterwards, no more wrinkles. Afterwards, no more wrinkles. |
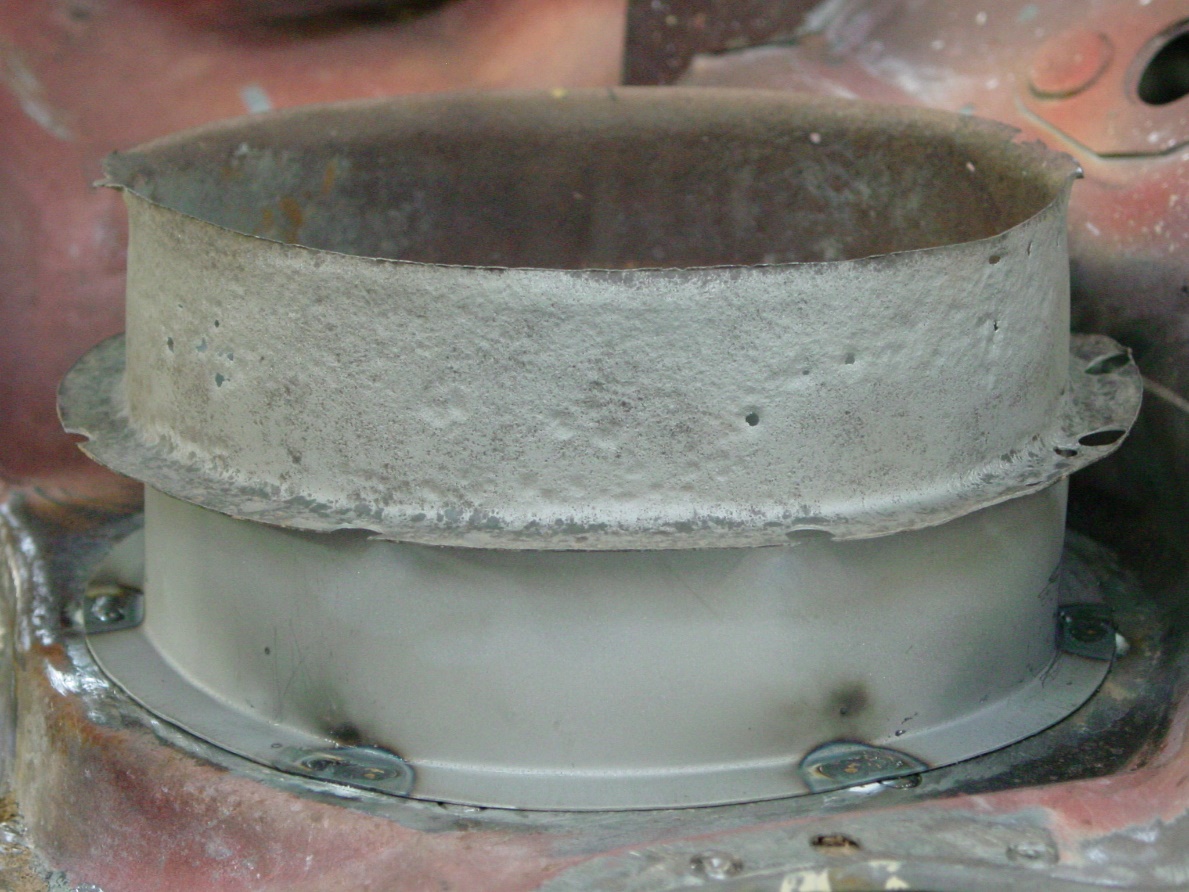
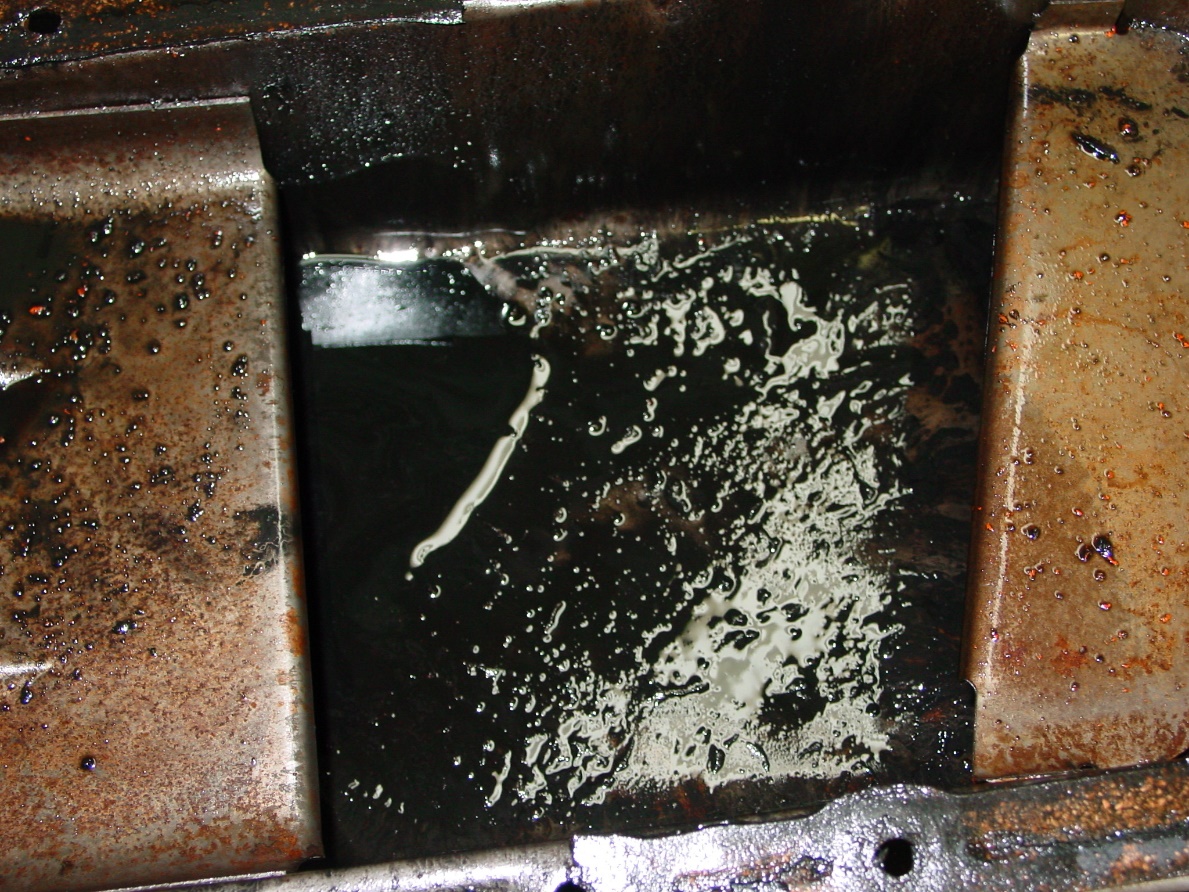 Inside of the oil pan, not so nice.Supposedly a new motor? Inside of the oil pan, not so nice.Supposedly a new motor? |
 Badly pitted rear main seal journal on the crankshaft, that’ll leak like the Exxon Valdez. Badly pitted rear main seal journal on the crankshaft, that’ll leak like the Exxon Valdez. |
 Back from the paint shop. Back from the paint shop. |
 The assembly / fun begins. The assembly / fun begins. |
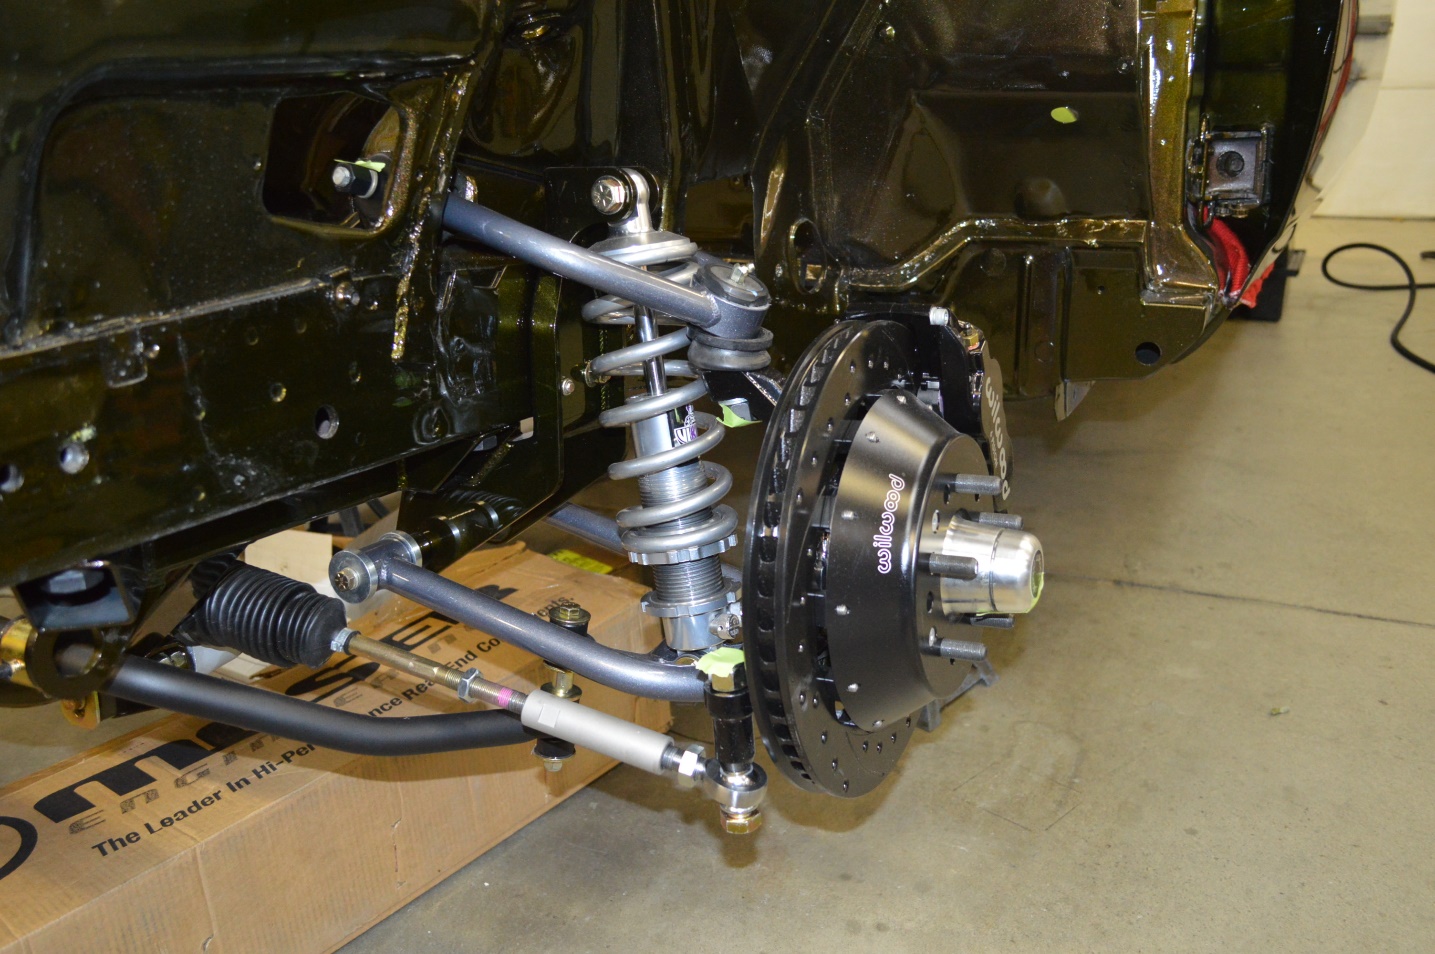 Front Suspension and brakes installed. Front Suspension and brakes installed. |
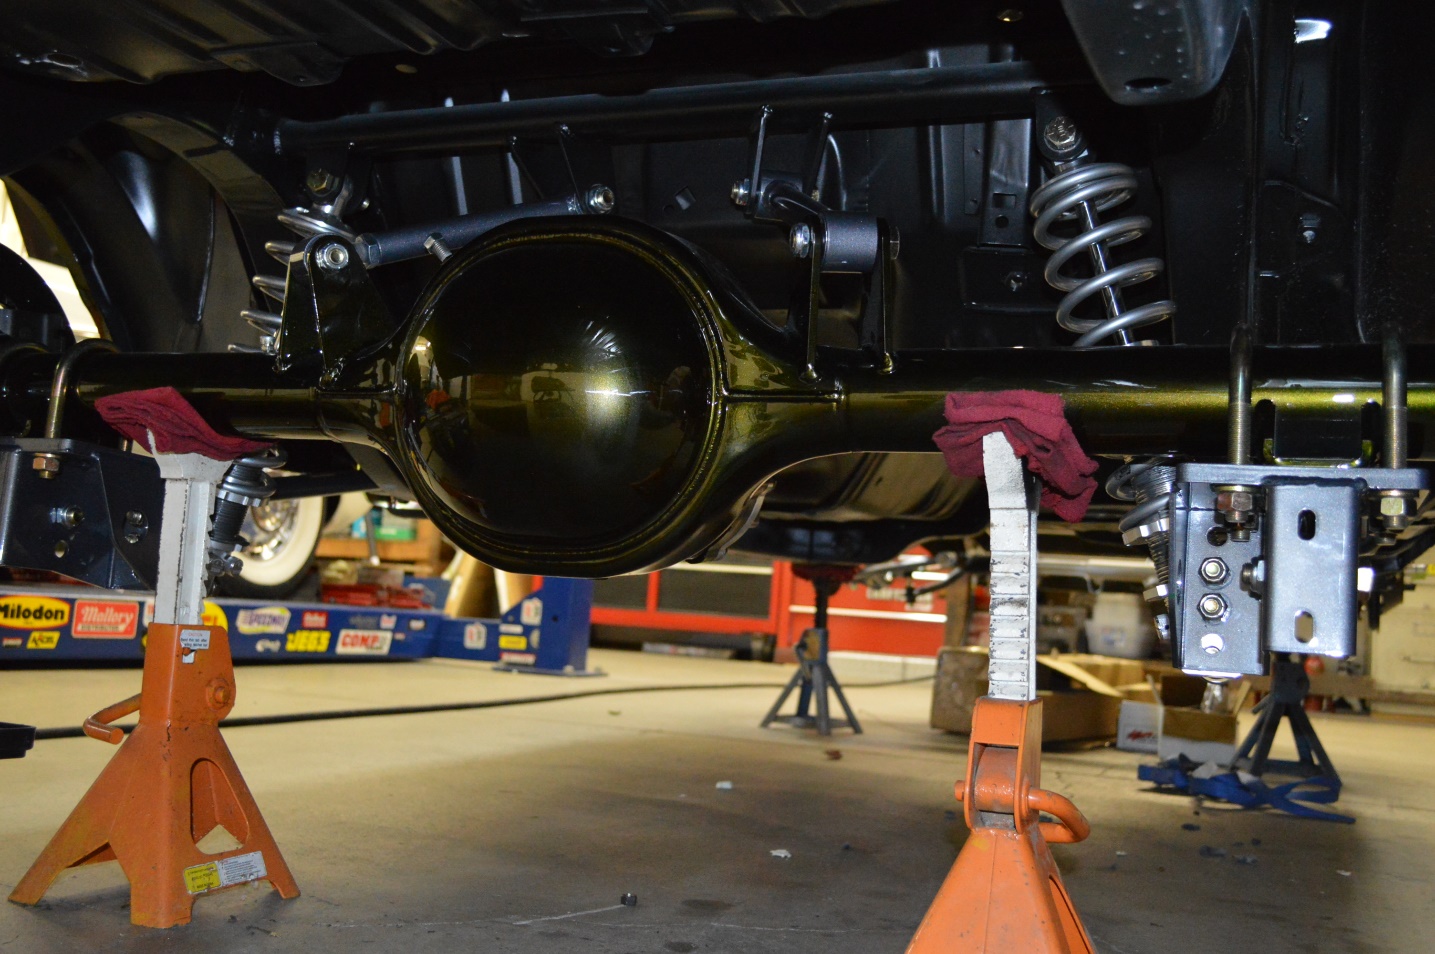 Rear suspension installed. Rear suspension installed. |
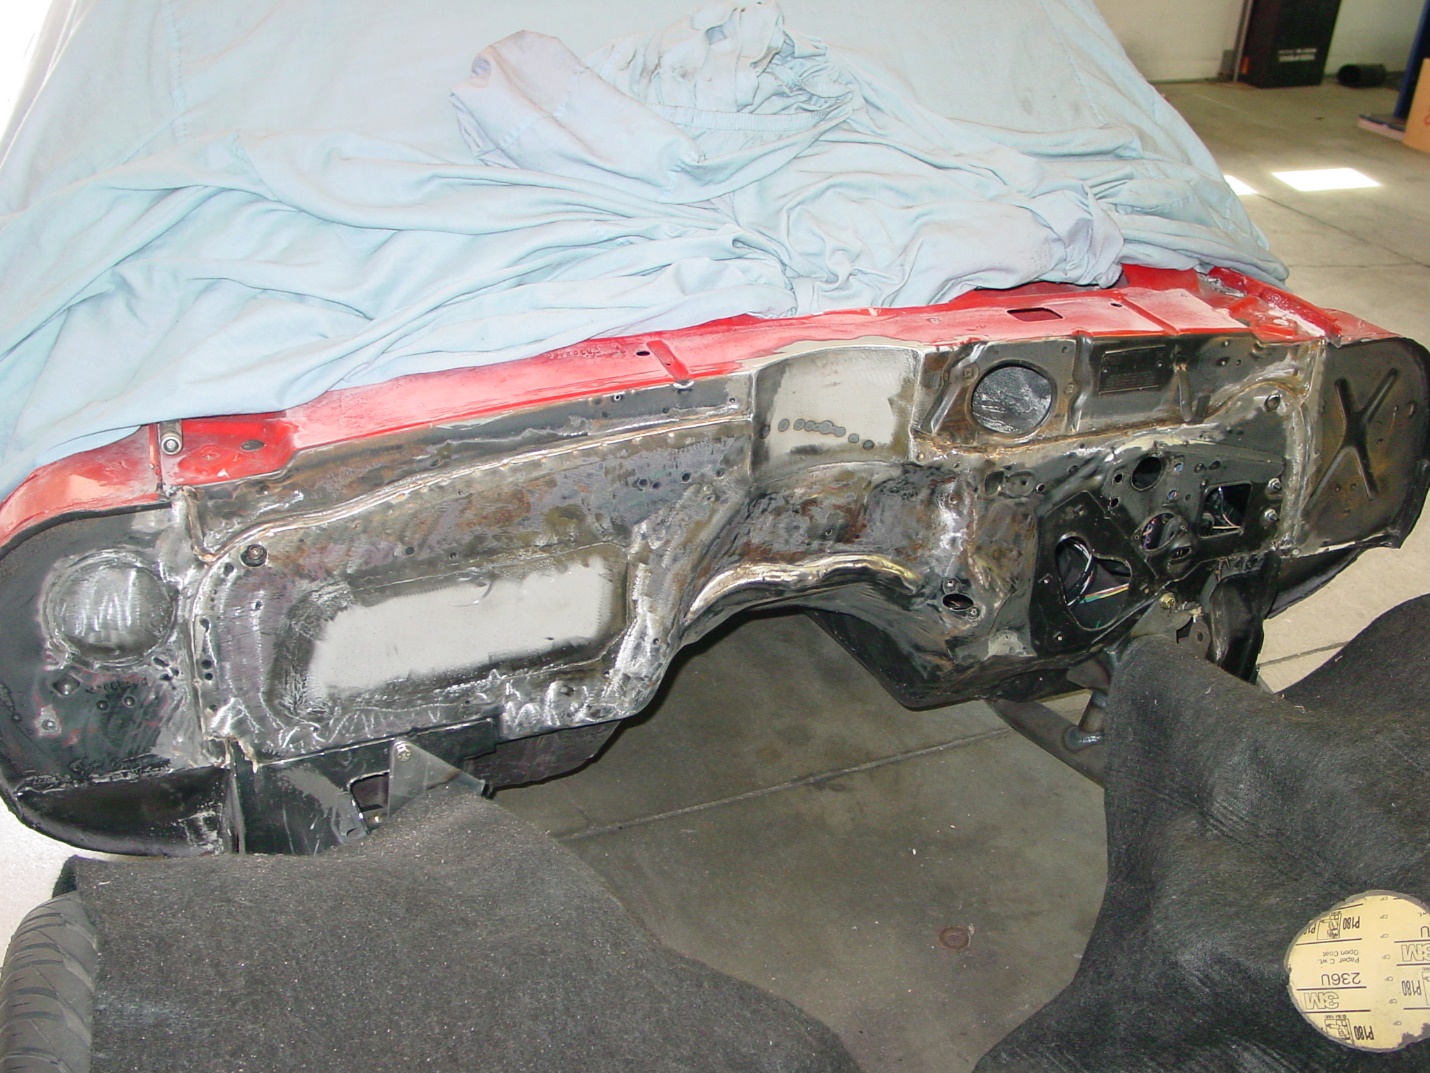
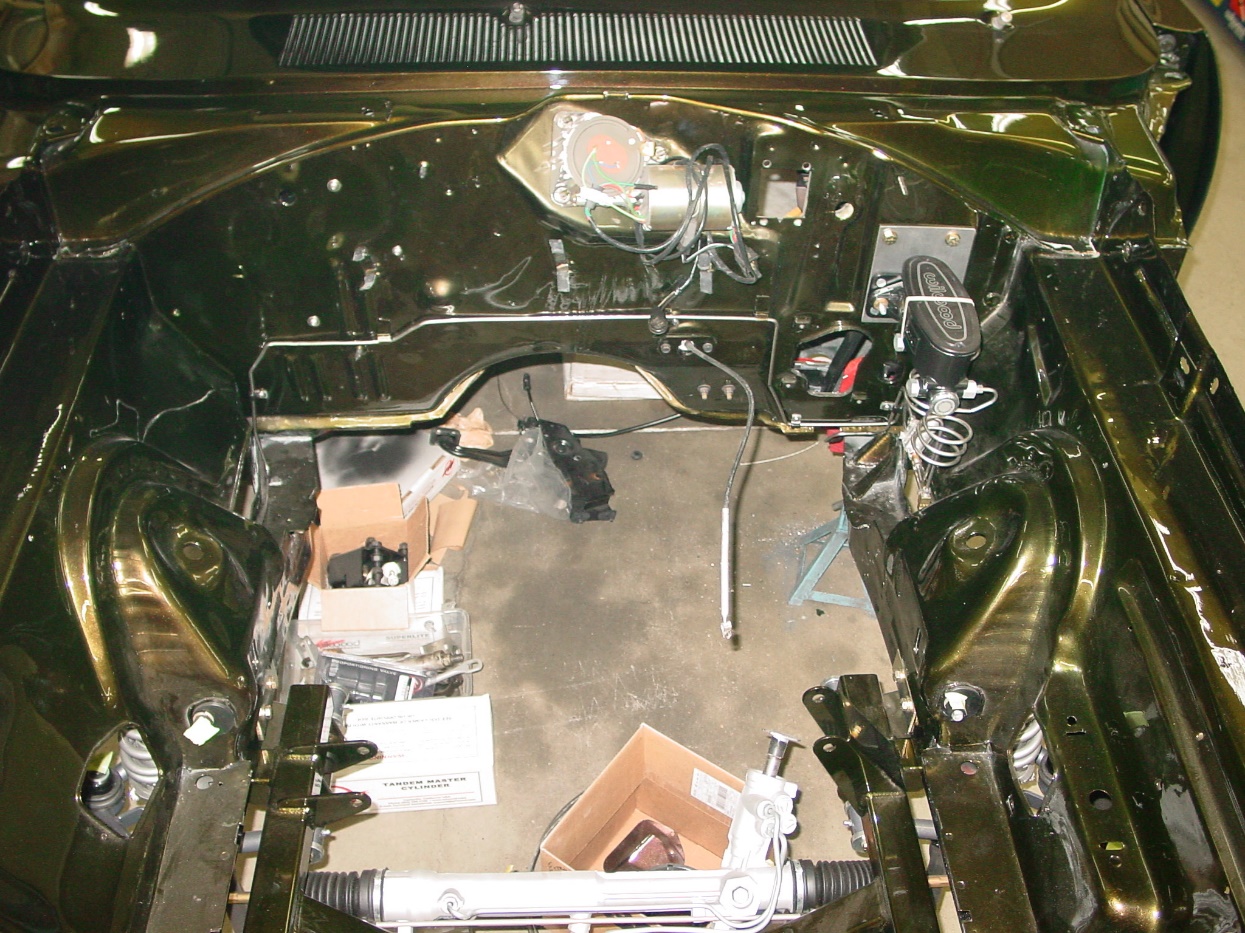 Firewall assembly coming along nicely. Firewall assembly coming along nicely. |
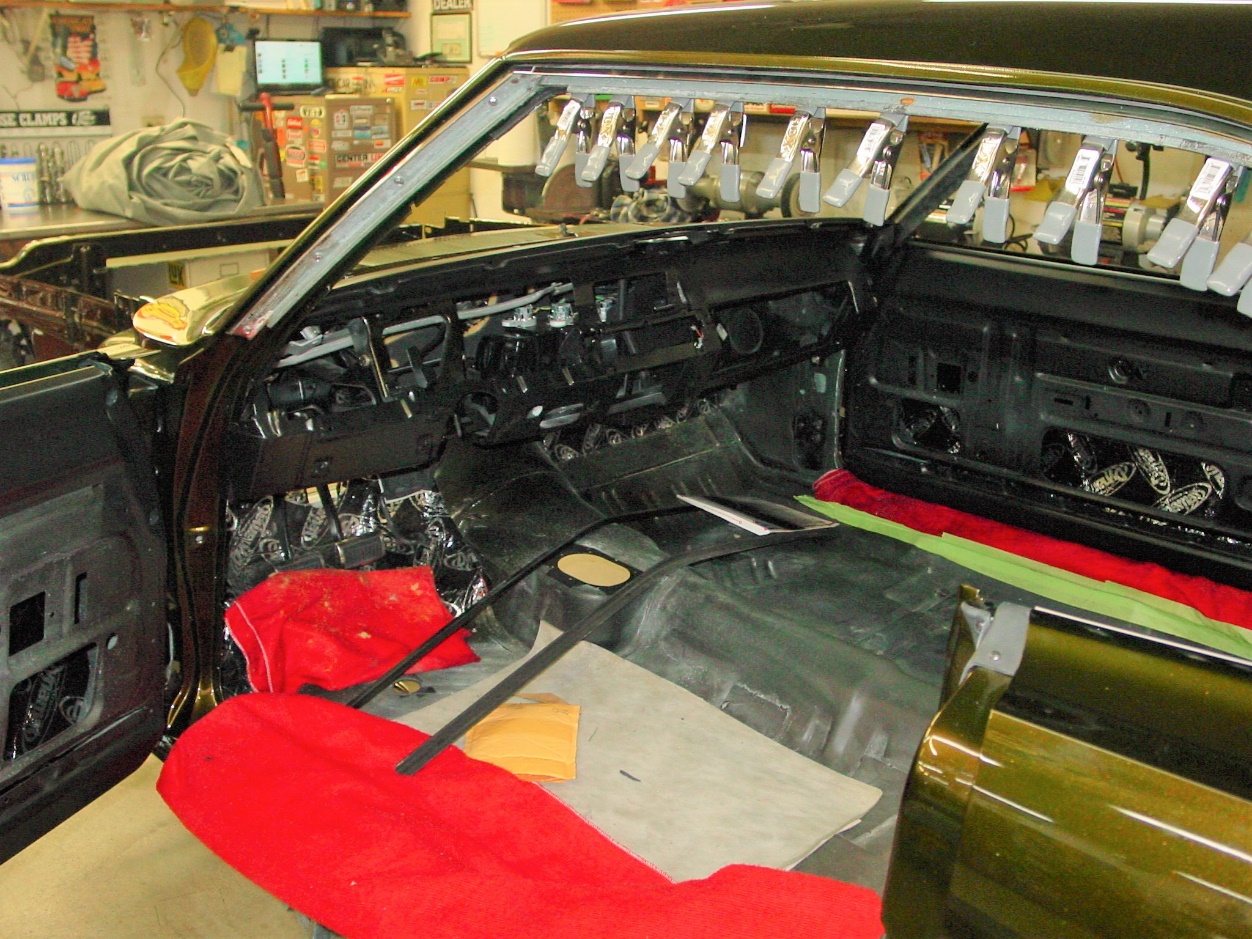 Dash and headliner being installed. Dash and headliner being installed. |
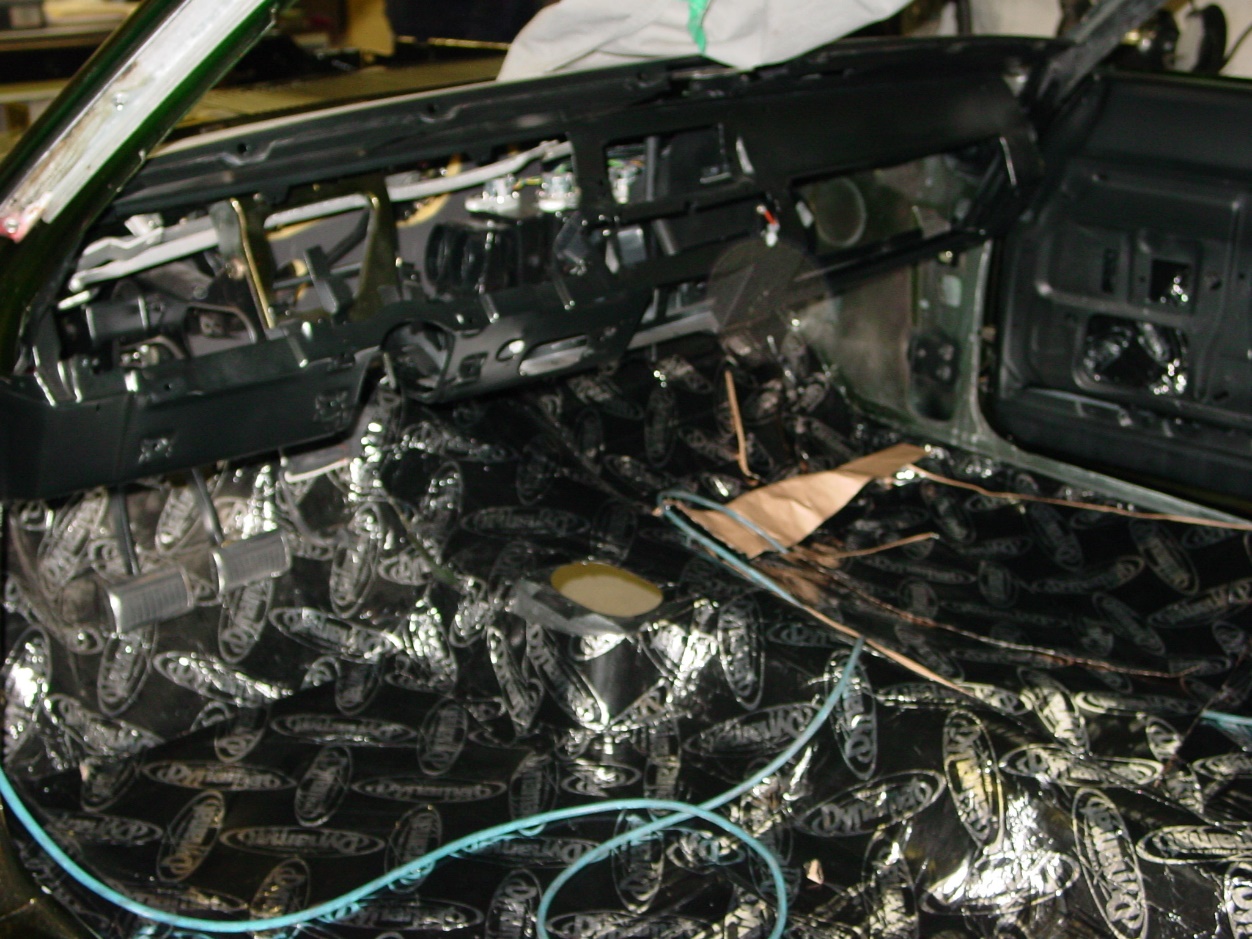 Dynamat going in,what a fun job. Dynamat going in,what a fun job. |
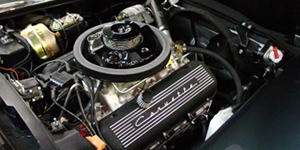
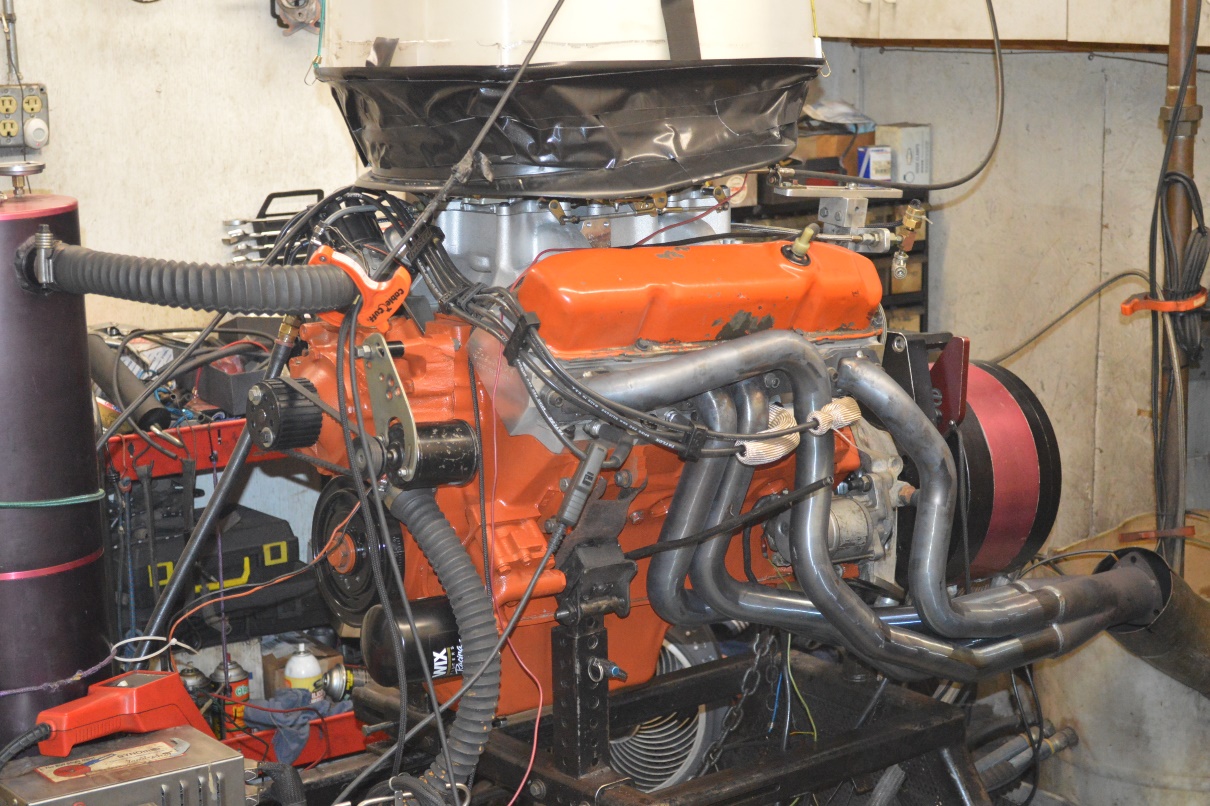 Engine on the Dyno, 580 HP & 540 lb-ft of torque. Engine on the Dyno, 580 HP & 540 lb-ft of torque. |
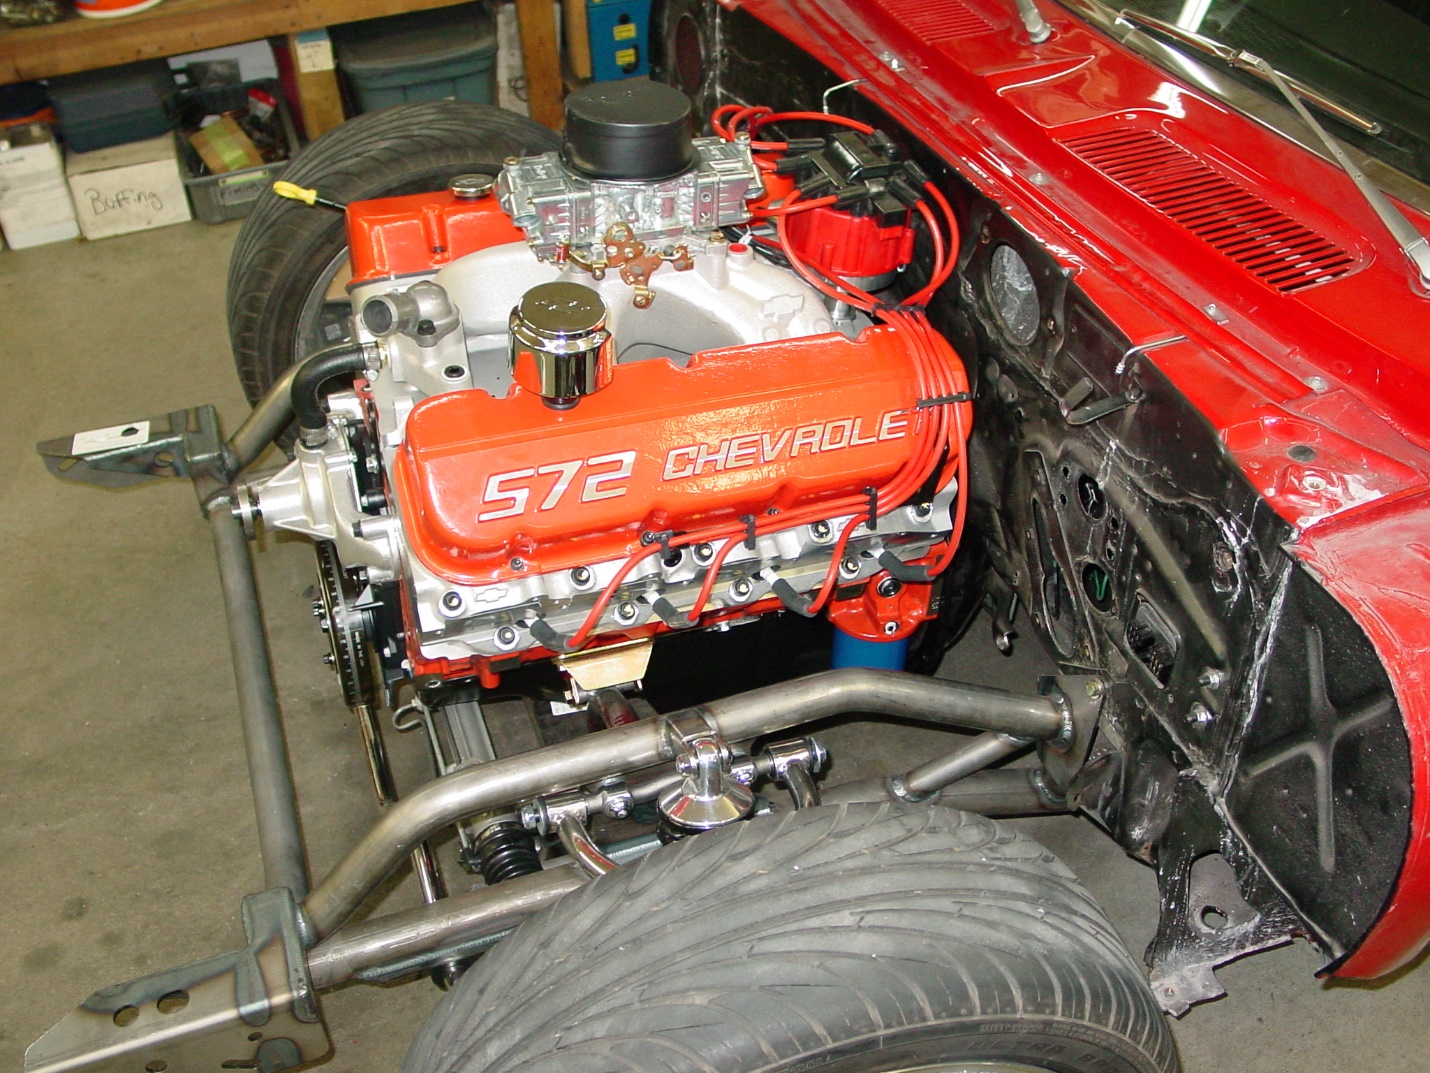
 Engine and trans in for the final time. Engine and trans in for the final time. |
 Trial fitting headers before sending to Jet Hot for coating Trial fitting headers before sending to Jet Hot for coating |
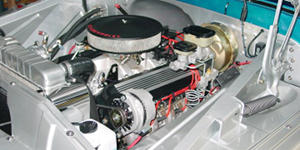
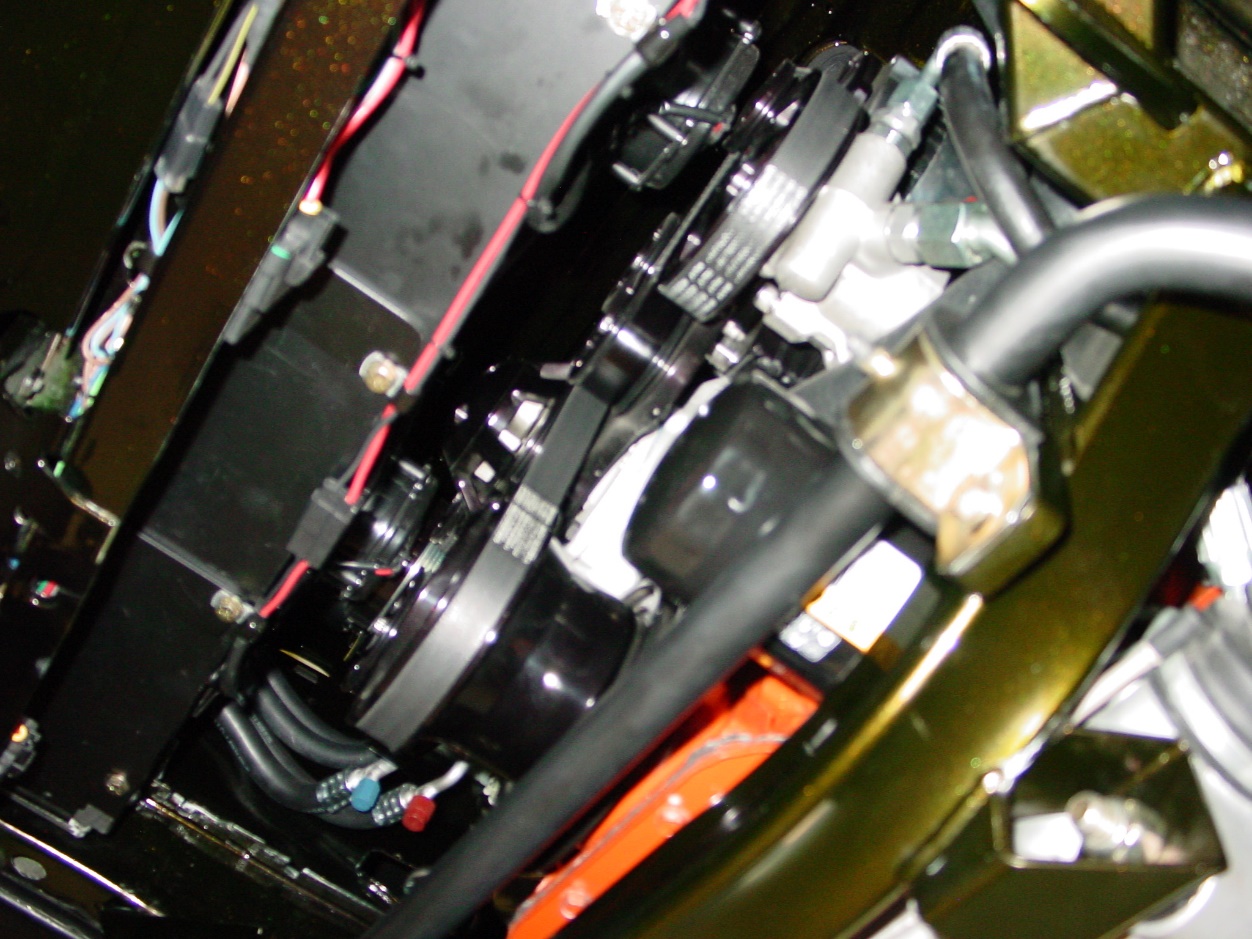
 Routing plug wires, wiring, linkages, fuel lines etc. Routing plug wires, wiring, linkages, fuel lines etc. |
 Engine compartment just about done. Engine compartment just about done. |
 Test fit on the wheels. Nice clearance. Measure twice, fit once. Test fit on the wheels. Nice clearance. Measure twice, fit once. |
 Front end assembly coming along. Front end assembly coming along. |
 Interior is almost done. Interior is almost done. |
 On the rack getting ready for the wheel alignment. On the rack getting ready for the wheel alignment. |
 Exhaust made and installed. Exhaust made and installed. |
 Underside looking back. Underside looking back. |
 Front of motor from the bottom up. Front of motor from the bottom up. |
 LF suspension. LF suspension. |
 Heading out for its initial test drive. Heading out for its initial test drive. |
 |
Coming back from the intital drive with minimal issues. We logged quite a few miles during multiple test drives working out the kinks that are typical of a rotisserie restoration. These annoyances are often left for the owner to get used to. :( | |||
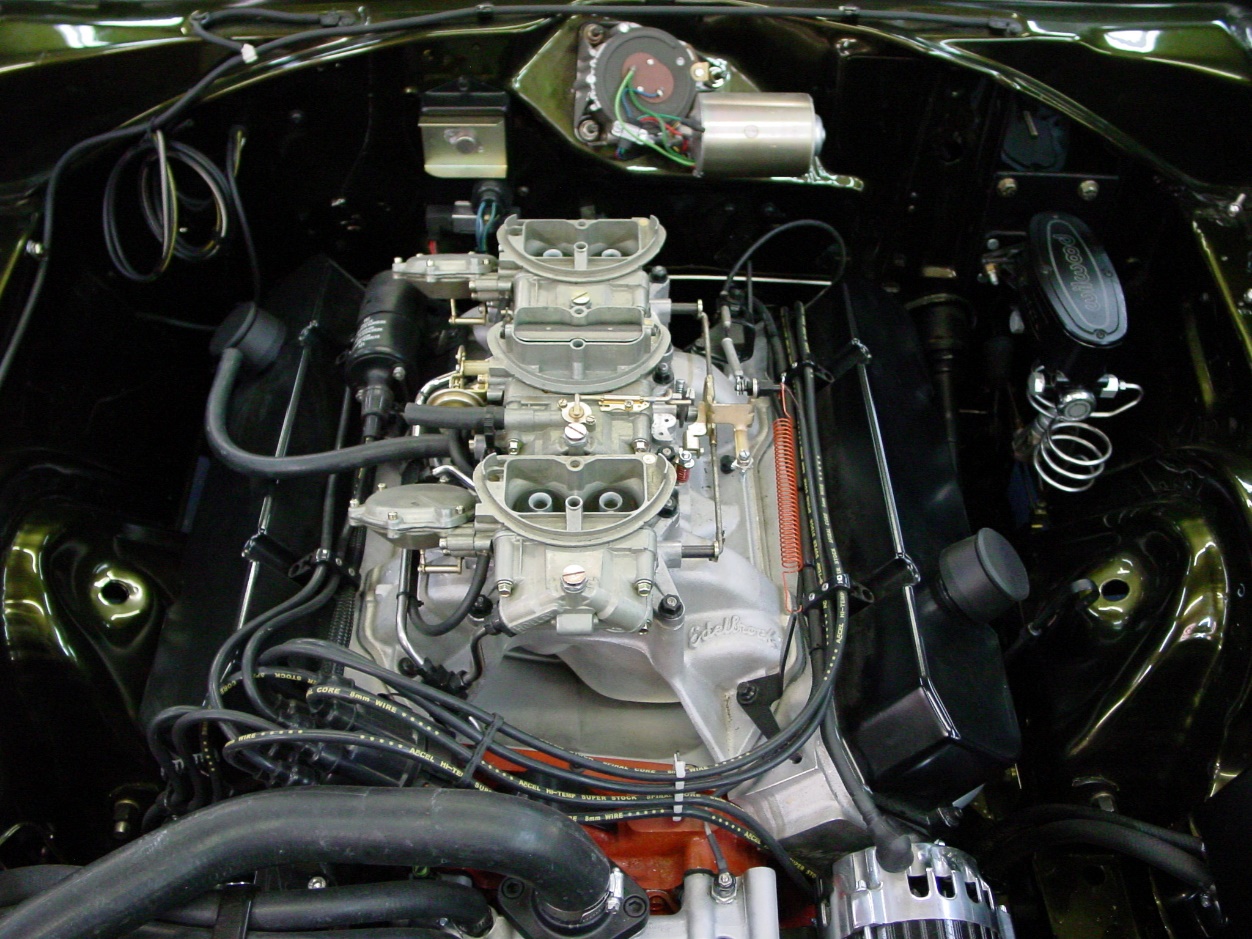
 L side of engine. L side of engine. |
 R side of Engine. R side of Engine. |
 Underside shot from rear. Underside shot from rear. |
 Underside pic at mid point. Underside pic at mid point. |
 Underside L Front. Underside L Front. |
 Front Underneath Front Underneath |
 Shot of the Ghost Stripes Shot of the Ghost Stripes |
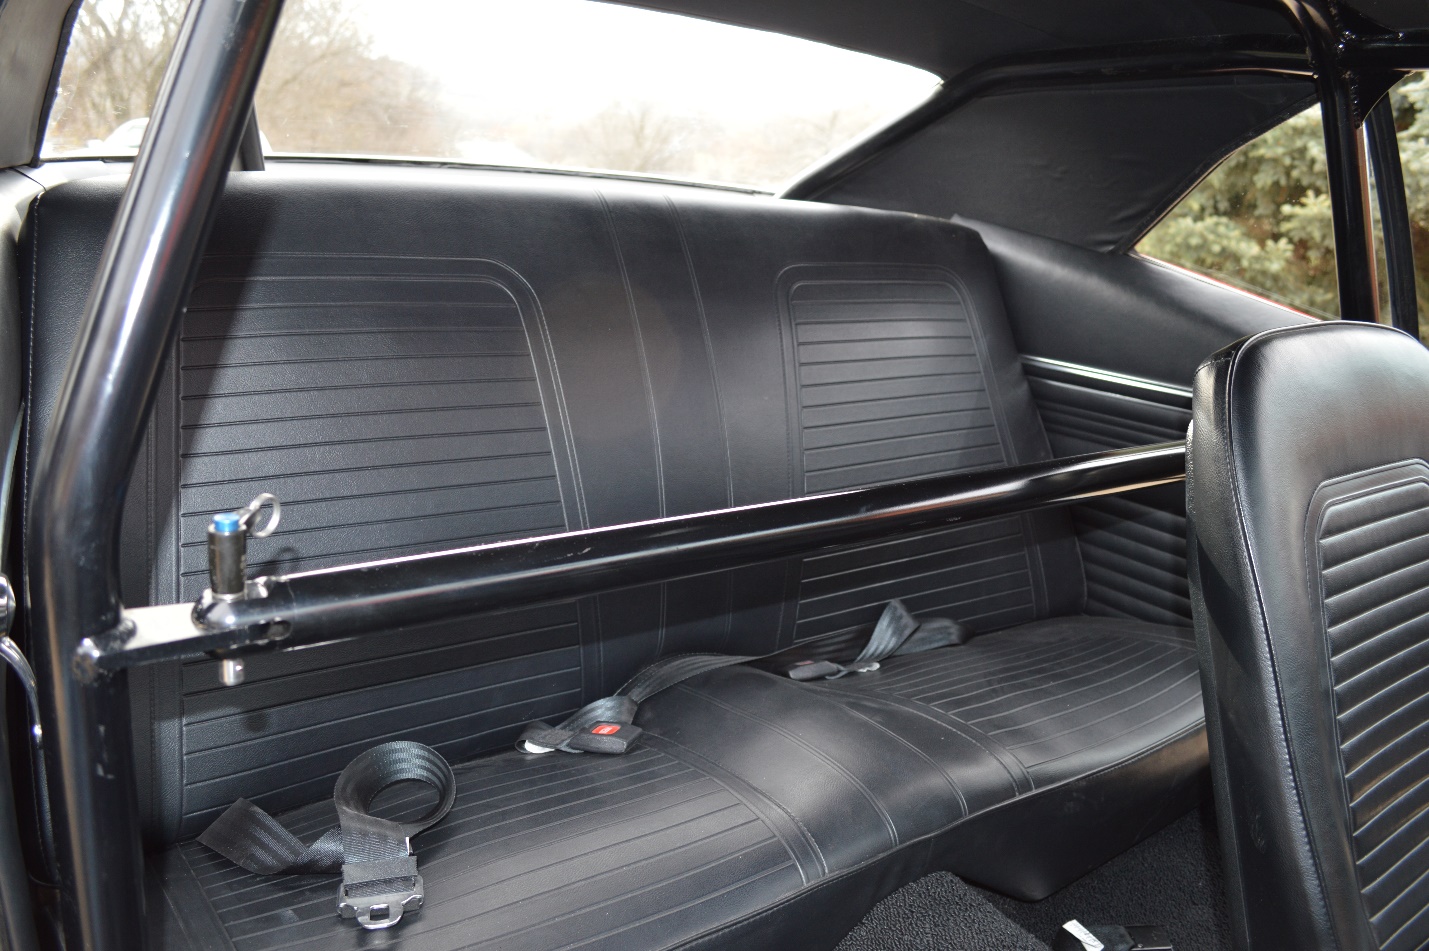
 Interior pic. Interior pic. |
 Back from another test run Back from another test run |
 Rear shot with spoiler Rear shot with spoiler |
 Air grabber open and ready :) Air grabber open and ready :) |
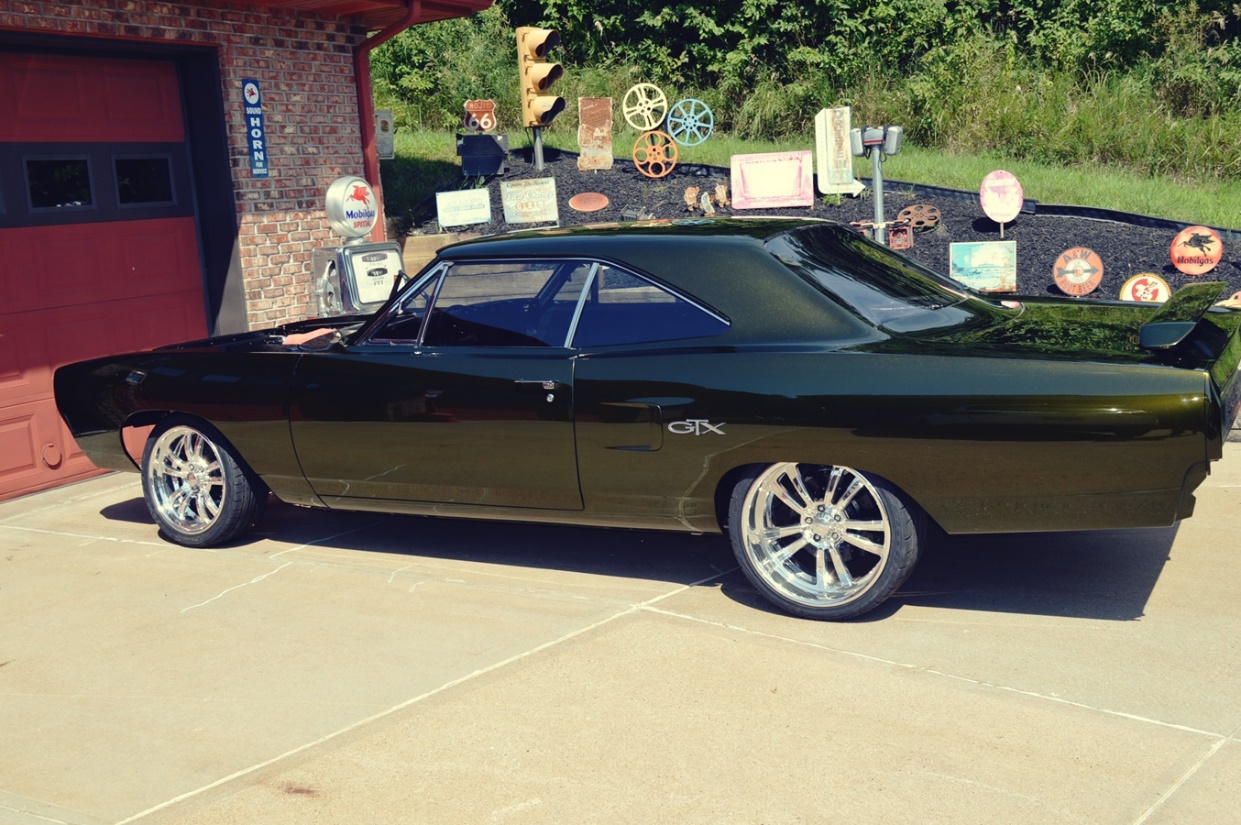
 The color really pops in the sunlight The color really pops in the sunlight |
 I'll call that close to Laser straight I'll call that close to Laser straight |
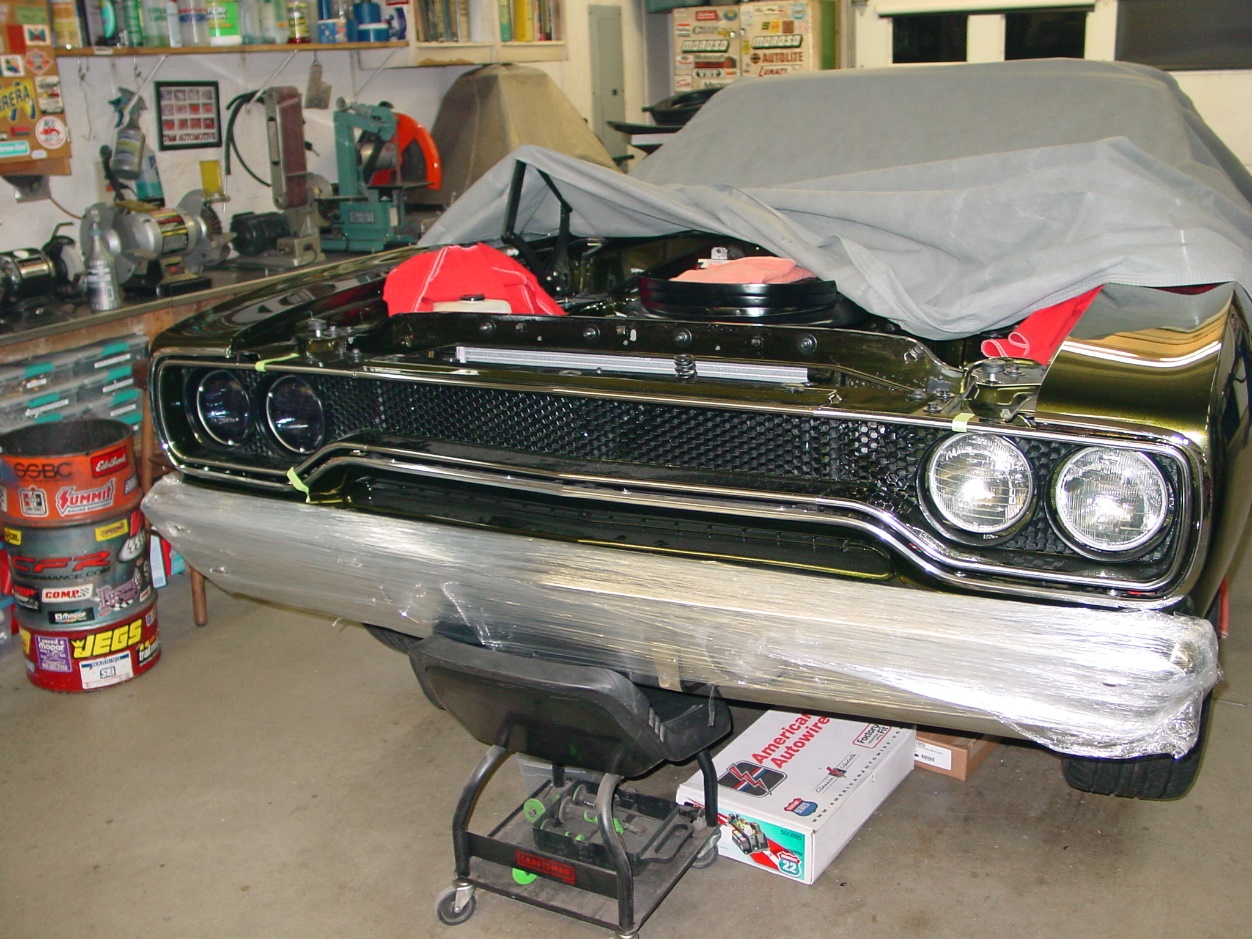
 As Purchased As Purchased |
 Ready to go home Ready to go home |
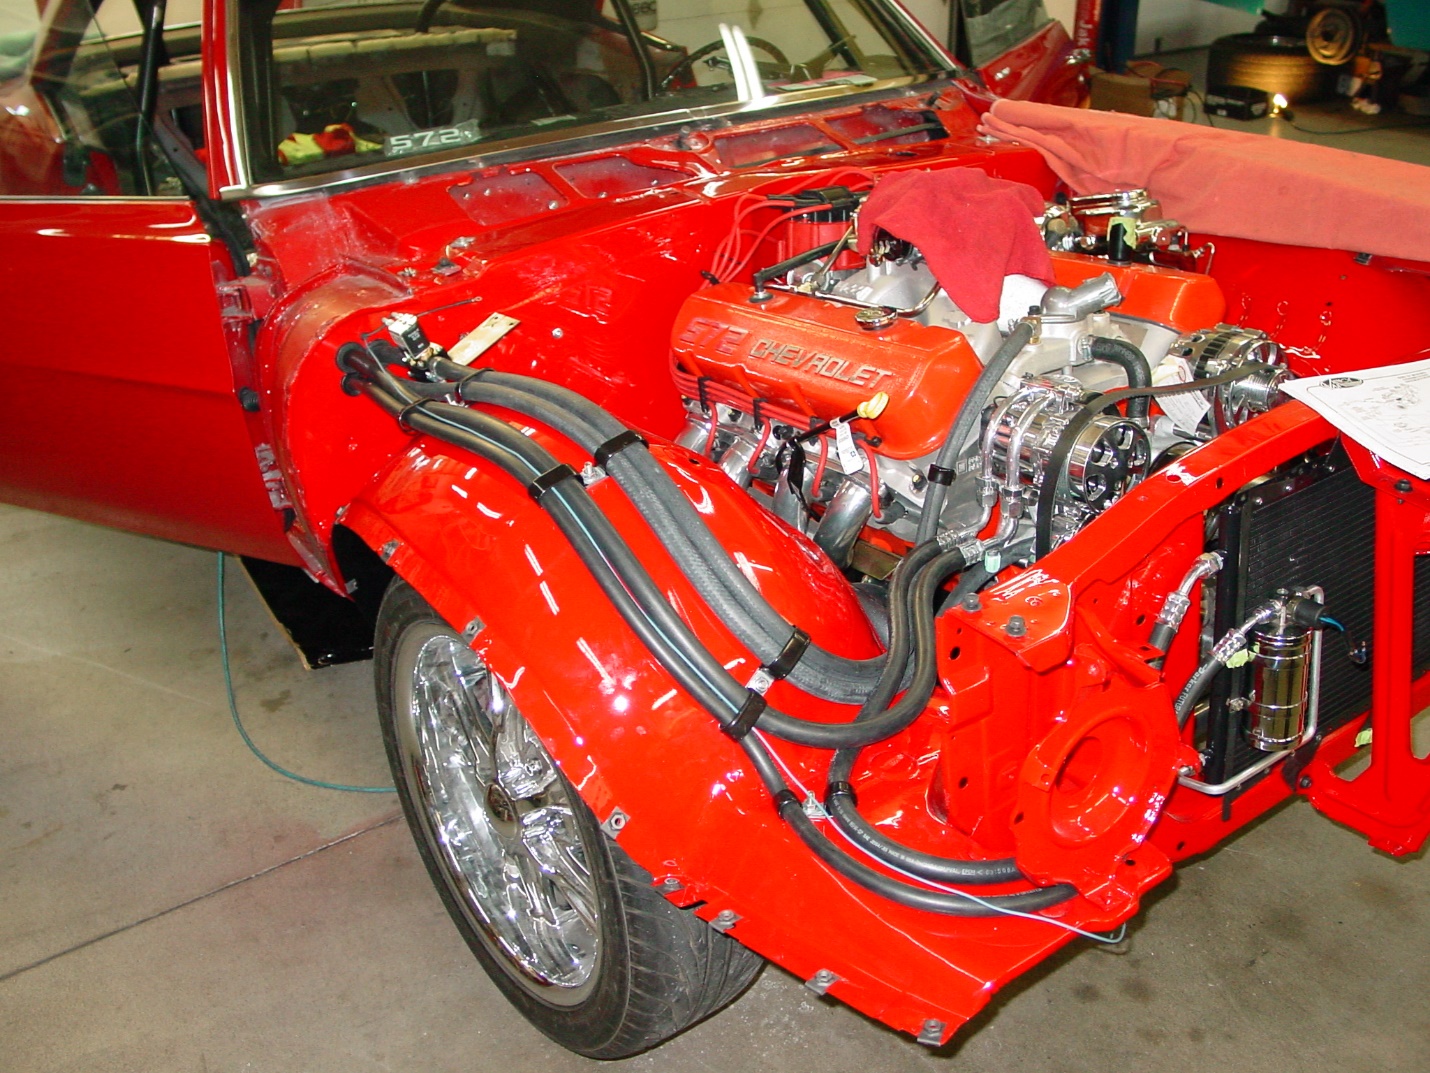
1969 CamaroAnother auction car that once again was delivered with a lot of unexpected issues. The worst of all was the underside unibody structure. It was badly rusted. The entire underside had been coated with bondo, fiberglass and screen material over the holes in the frame. It had then been sprayed with a bed liner coating to hide the slip shod work. This was exposed during one of our 5 hour inspectionsThis car was done in two phases, the first was to get rid of the rust and make the vehicle safe and reliable. The owner then picked up the car to enjoy it during the summer bringing it back to us in the late fall for Phase 2. Phase 2 consisted of upgrading the entire front and rear suspension, installing a 572 crate motor from Chevrolet, 9 inch rear end from Moser, vintage air, billet specialties serpentine system, Tremec 5 spd, Wilwood 4 wheel disc brakes, 3 inch SS mandrel bent exhaust, hard plumbed ½” stainless steel fuel line and brake lines, , 8 point chrome moly roll cage, weld in sub frame connectors and the list goes on. |
||||
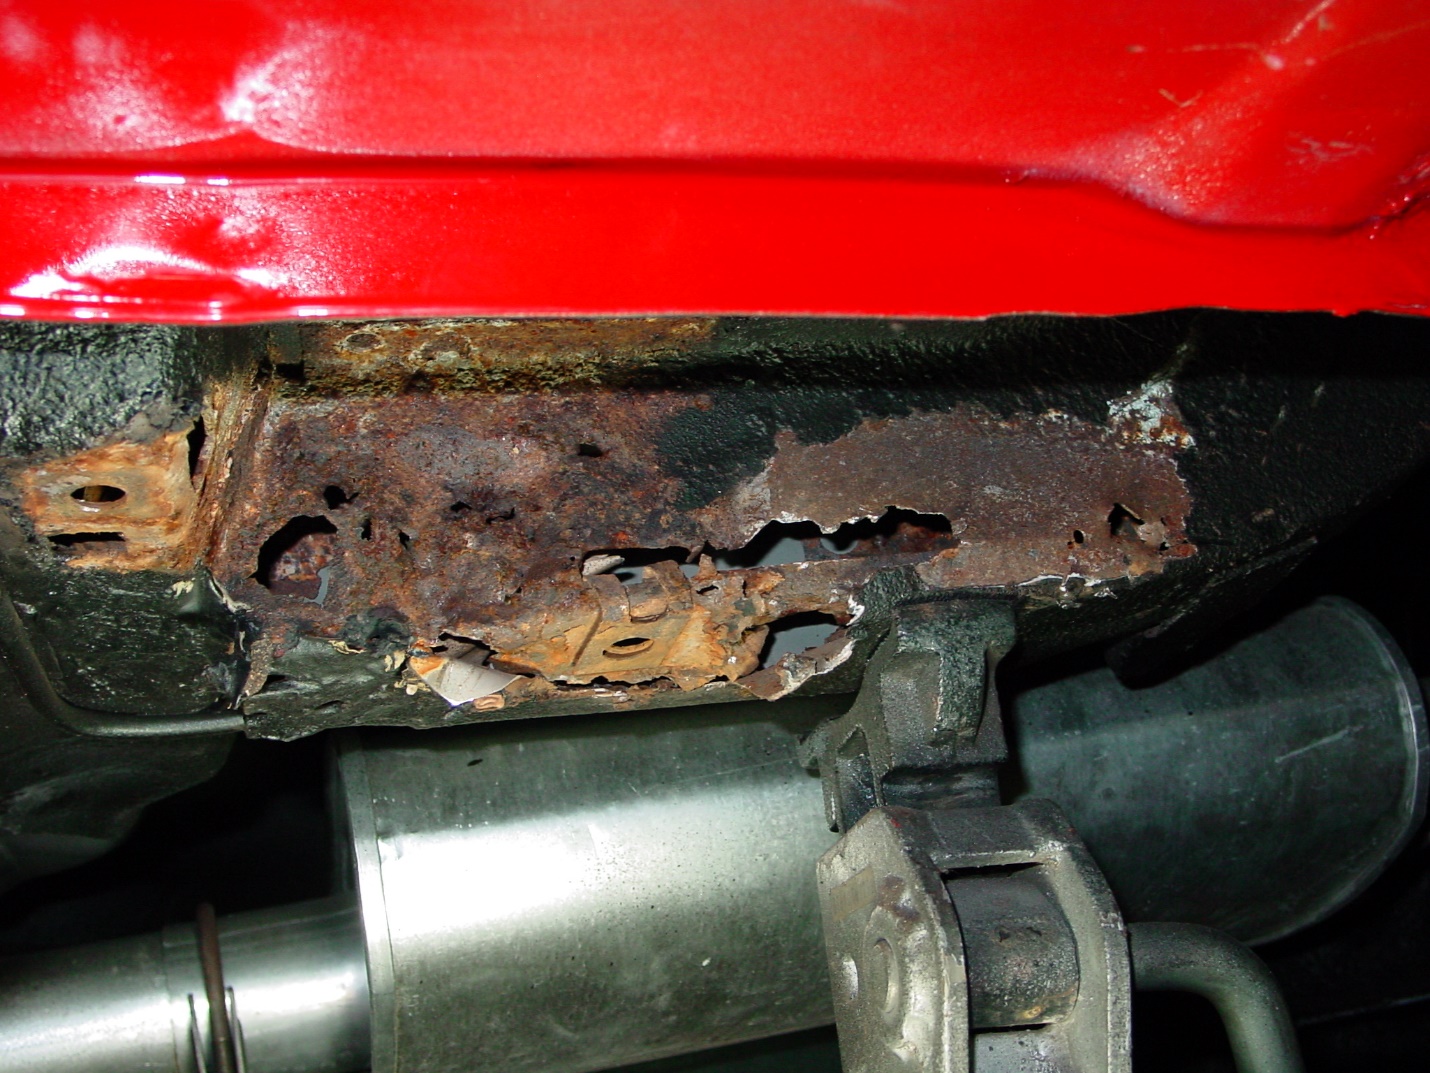 Bondo’ed over frame rail discovered during the inspection process. NICE!!! Bondo’ed over frame rail discovered during the inspection process. NICE!!! |
 |
 |
 Ok, enough of the rust, believe me, there was plenty more. |
 All new sheetmetal, floor pans, frame rails, trunk pan, etc. going in. |
BACK IN for Phase II |
||||
 Out with the old, in with the new. |
 Trial fitting the new front suspension. Trial fitting the new front suspension. |
 The engine fits, the wiper motor doesn’t, :( So it was moved inside the cowl :) |
 Unneeded firewall holes welded shut. Note: Relief added for distributor. It cleared without it but BARELY!! |
 Trial fitting the Lemon’s headers before sending them out to Jet Hot for coating. |
 Trial fitting the new rear suspension and 9 inch. |
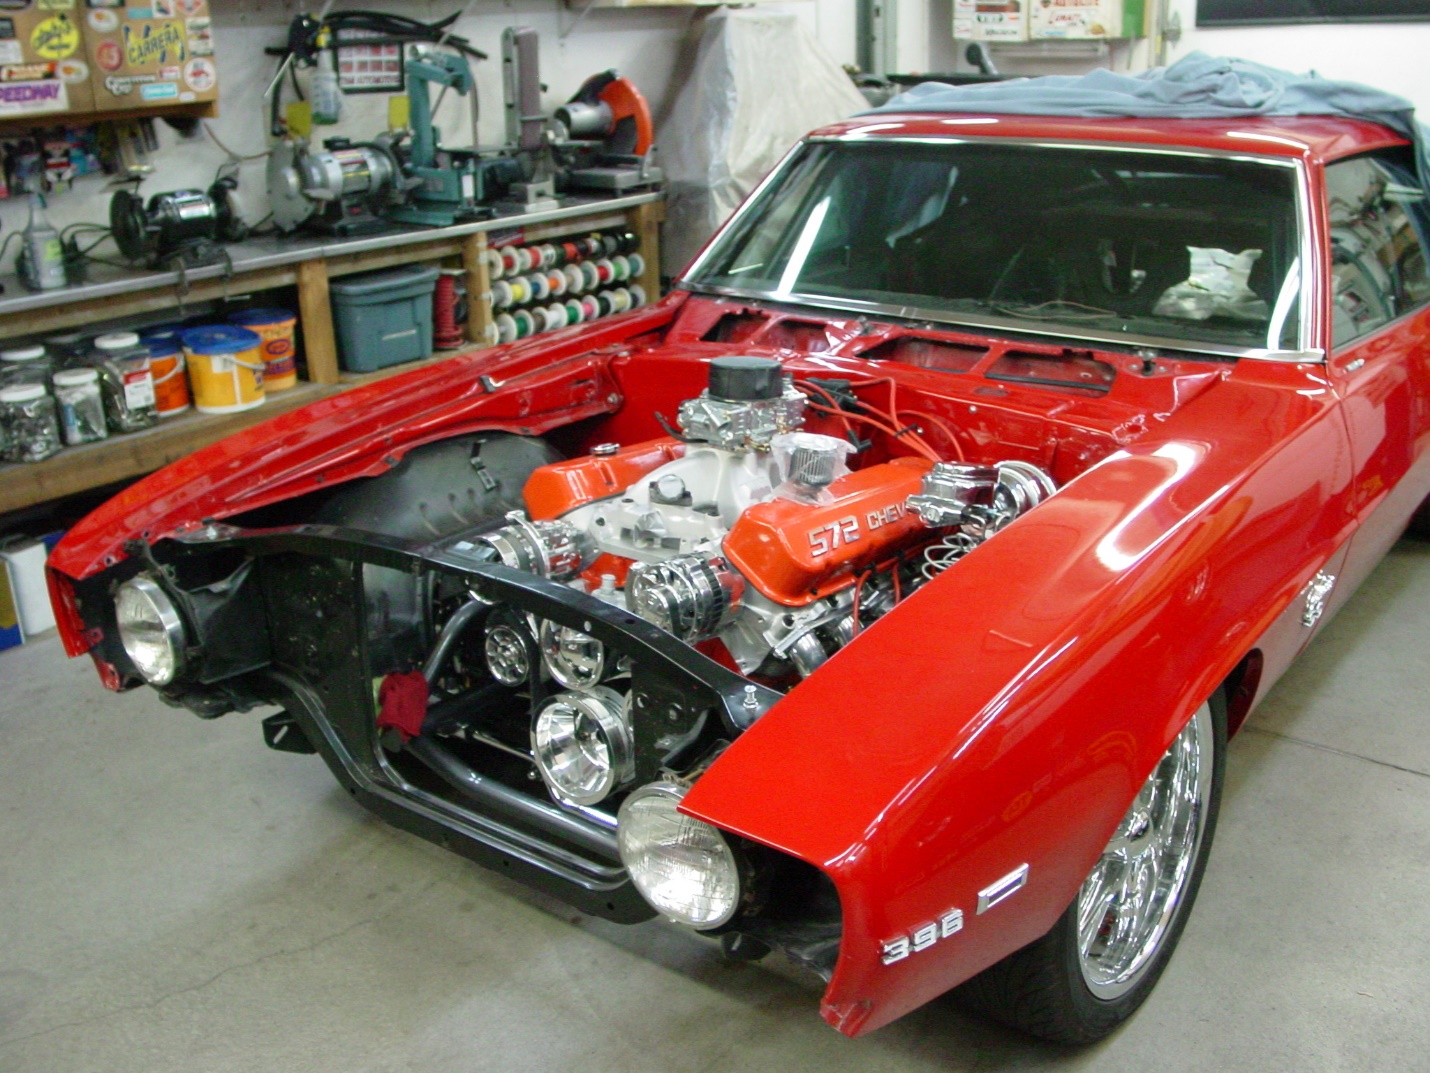
 Going back together for the final time, all is fitting nicely. |
 Trial fitting the front sheet metal. LOOKIN GOOD! |
 Front sheet metal going on for the last time. Running the A/C and heater hoses. |
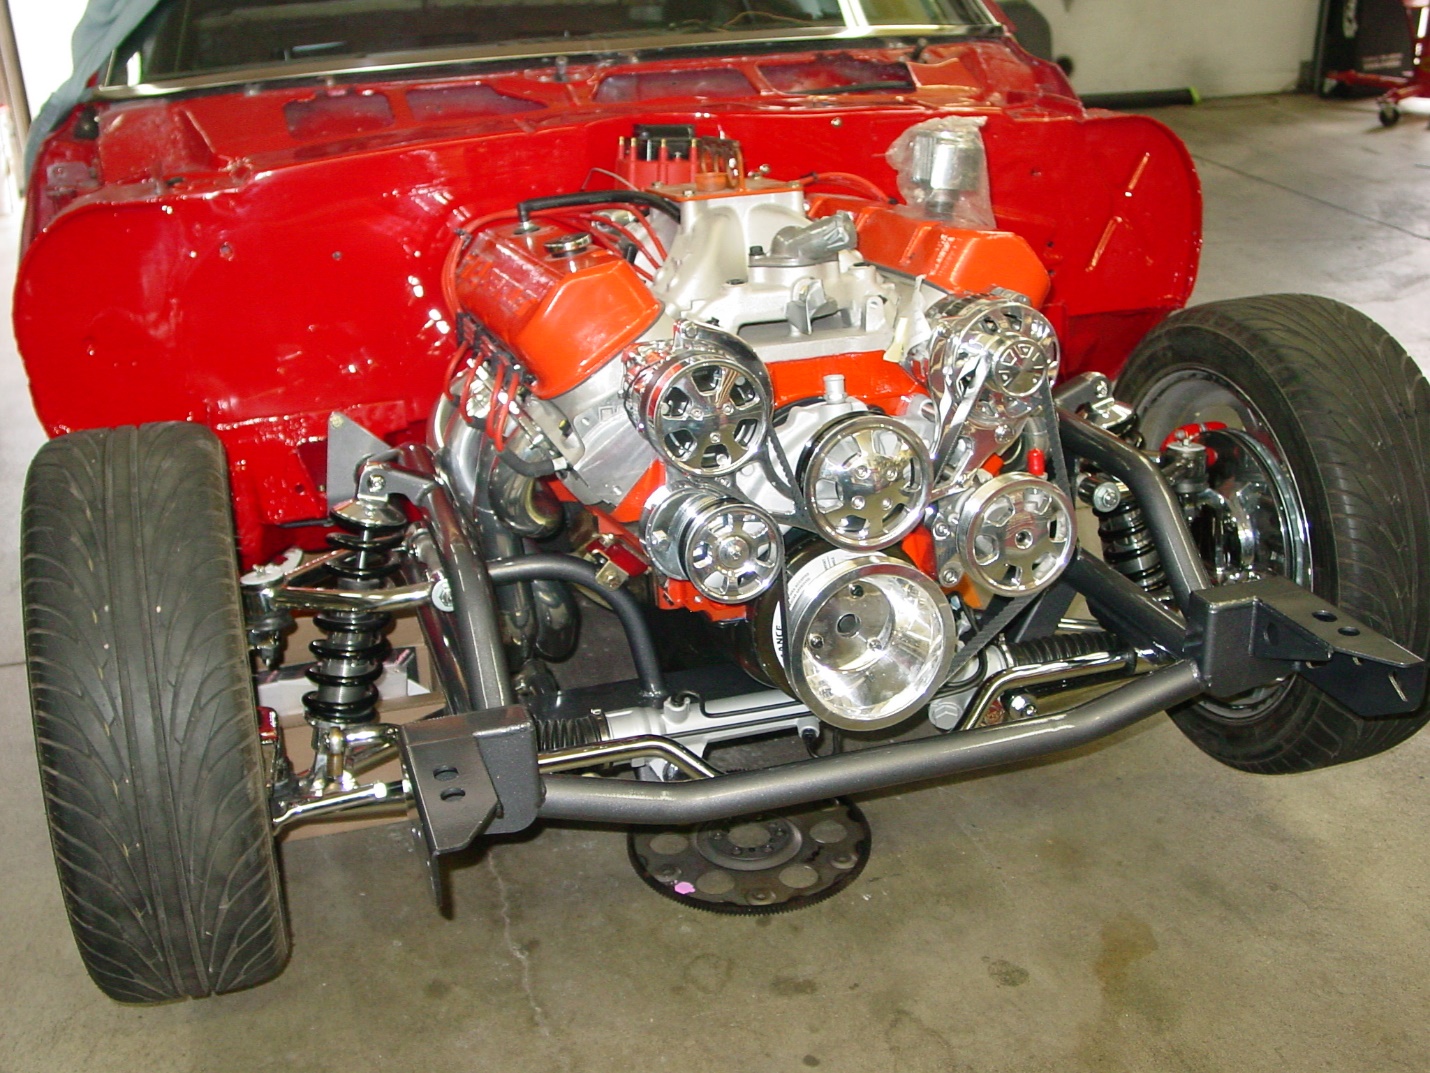
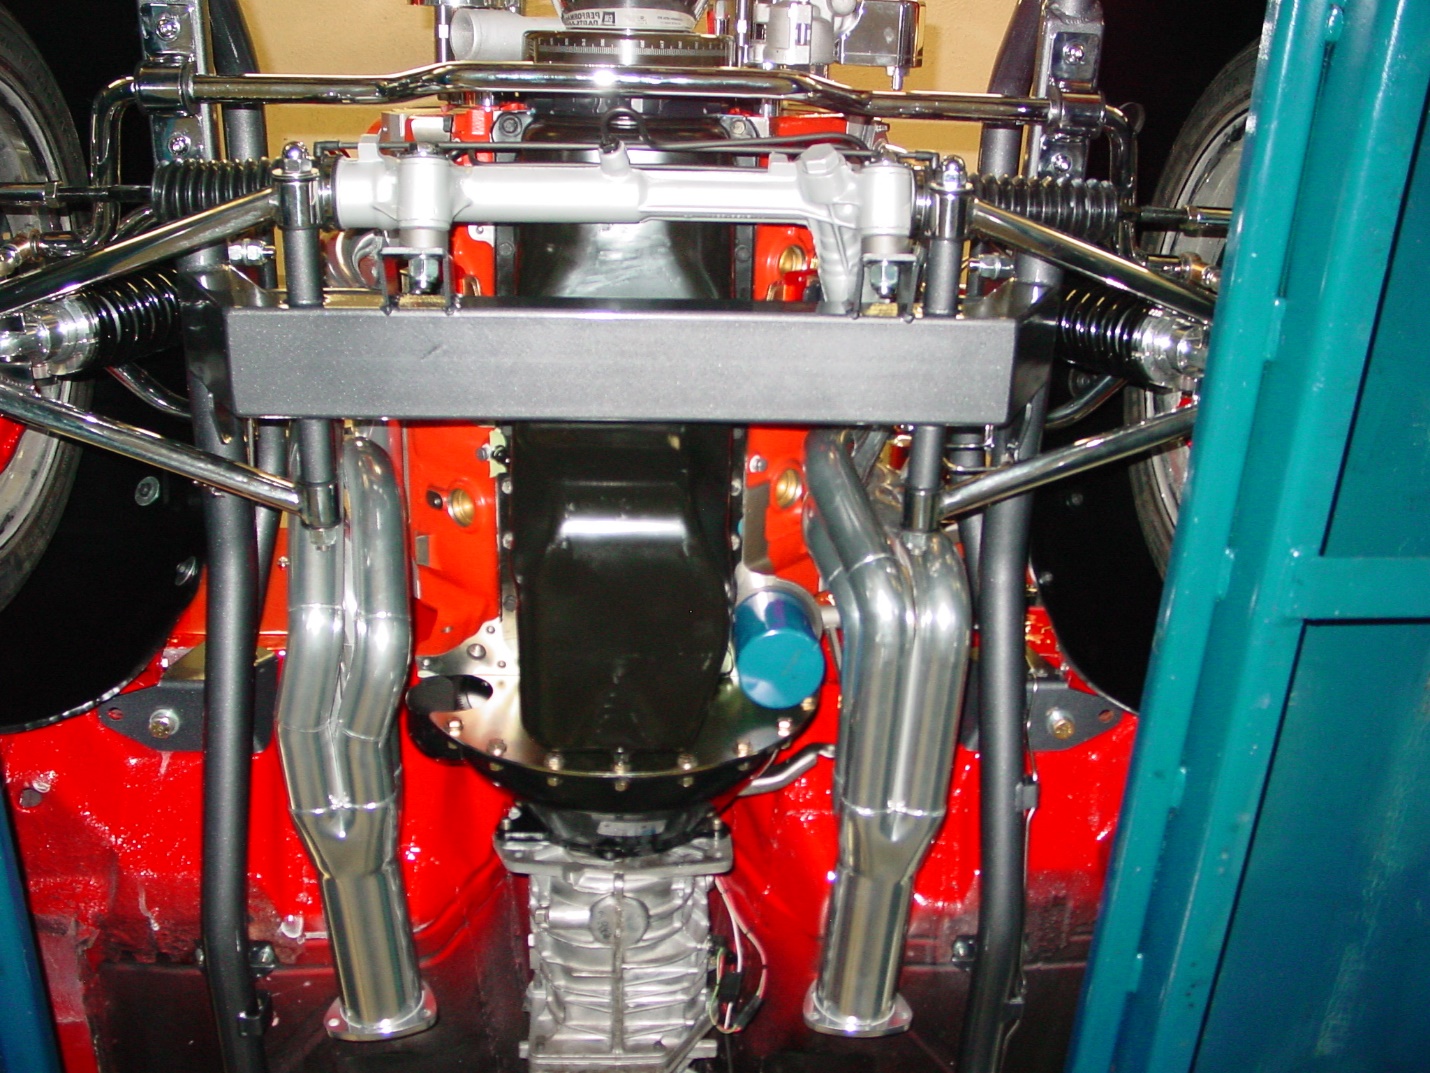 Underside shot of engine/ trans. |
 Underside from rear forward, and yes the R muffler was leveled ;) |
 8 point cage installed. |
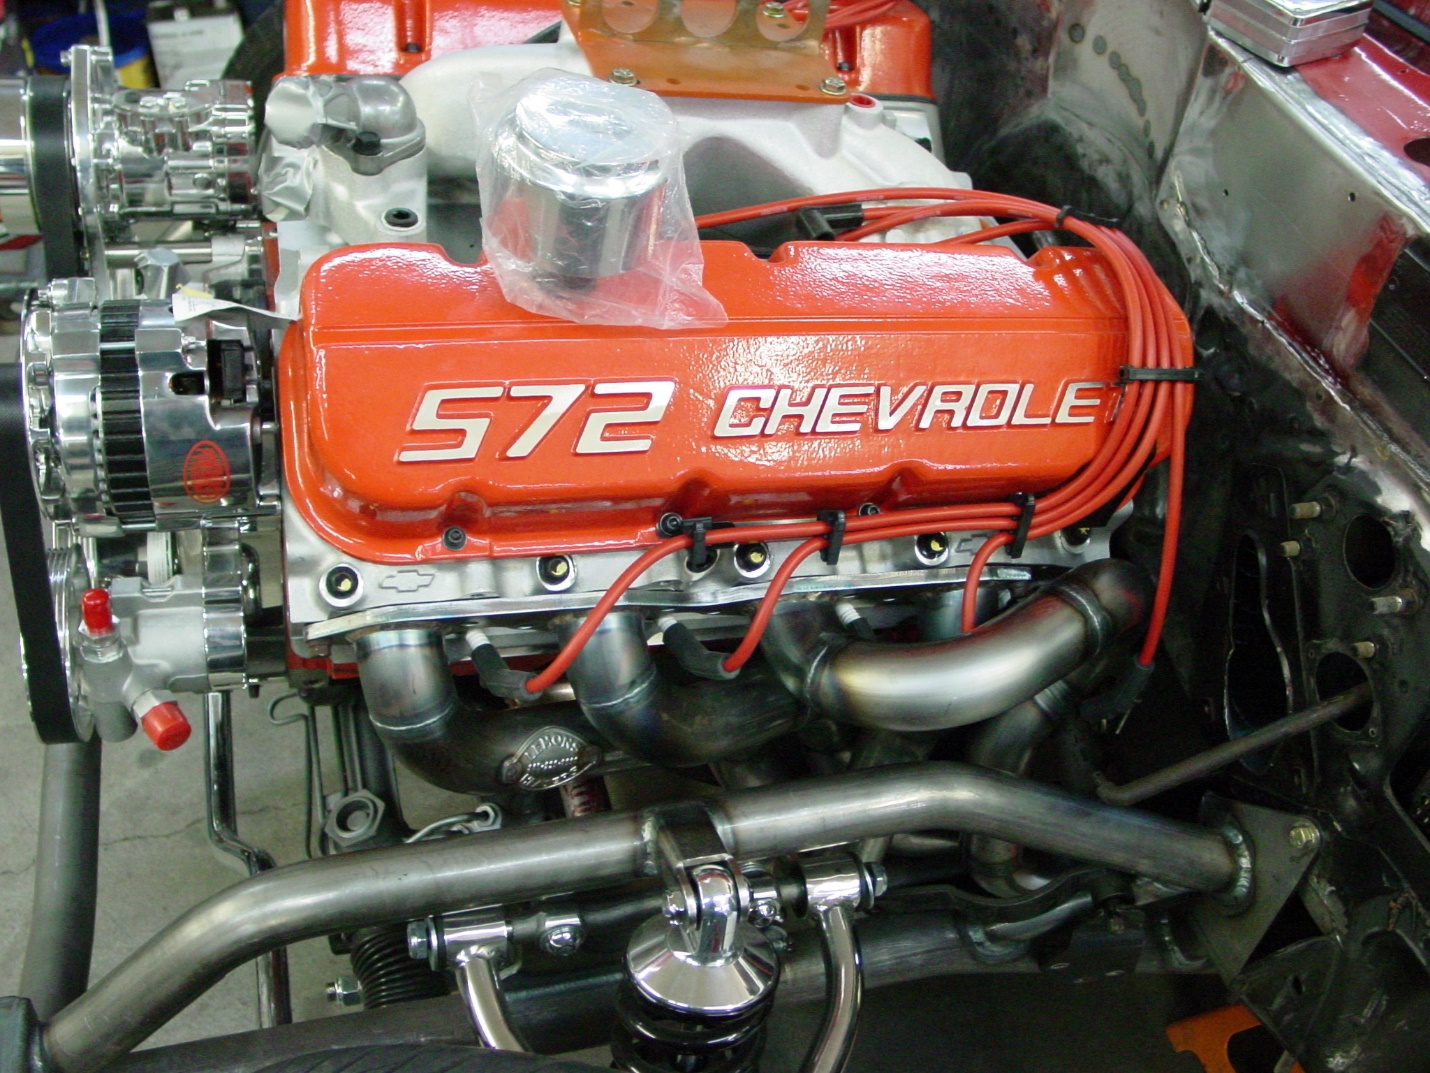
 L side of engine. L side of engine. |
R Side of engine. |
 Road tested and ready for delivery. |
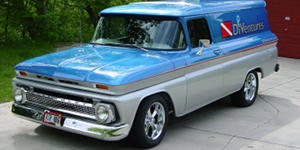
| DiVentures 63 Chevy panel truck, to be used for promotions. It started with a "vision" list, and wound up as you see it here. 454 rate, 700 R4 trans, Autometer Nexus gauges, Vintage air, Cruise, Tilt, PS, PW,Power door locks, 4 leather captains chairs with 6 way adjust, lumbar and heat, 3 point seat belts power disc brakes, all new wiring and a whole lot more. The rear showcases a 42" flat screen that hides in the ceiling when not in use, a PS3 player. They are plumbed into JL audio components This thing ROCKS!! It also is capable of running the entire system for 3+ hours on a stand alone battery system. If additional play time is needed inputs for a 115v Household source or generator are available. SWEET!!!! |  |
|||
 The '63 Chevy panel truck as purchased in Chicago. The '63 Chevy panel truck as purchased in Chicago. |
 Existing interior and dash being removed. Existing interior and dash being removed. |
 The small block will find a new home :) The small block will find a new home :) |
 Big block grunt needed for towing being trial fit. Big block grunt needed for towing being trial fit. |
 Stripping paint what a fun job!! Stripping paint what a fun job!! |
 The vehicle had solenoids which the owner despised so,Outside handle reinstalled The vehicle had solenoids which the owner despised so,Outside handle reinstalled |
 Back inside of door with latch Back inside of door with latch |
 Door striker replaced, A lot of work to undo the solenoids Door striker replaced, A lot of work to undo the solenoids |
 New lower 1/4's being installed New lower 1/4's being installed |
 Custom dash taking shape Custom dash taking shape |
 Custom made Guage panel going through trial assembly Custom made Guage panel going through trial assembly |
 Back from Paint Back from Paint |
 New GM Crate going in New GM Crate going in |
 Dash Assembly coming along Check out the airbrushed graphics Dash Assembly coming along Check out the airbrushed graphics |
 On the rack getting the bottom side buttoned up On the rack getting the bottom side buttoned up |
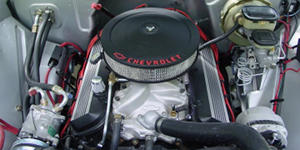
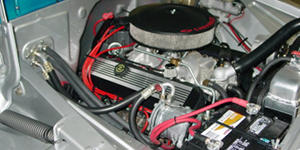
 New 454 Crate motor from GM looking like it came there, COOL!!! |
 Just about ready for a road burn. |
 Overhead shot of motor install. Overhead shot of motor install. |
 New wheels finally arrived. They made quite a difference. New wheels finally arrived. They made quite a difference. |
 Out for its maiden voyage. it returned without a glitch Out for its maiden voyage. it returned without a glitch |
 Dash is all finished Dash is all finished |
 The finished interior. Leather 6-way power seats with heat and lumbar, 3-point seatbelts, power windows, locks, and a lot more. The finished interior. Leather 6-way power seats with heat and lumbar, 3-point seatbelts, power windows, locks, and a lot more. |
 A shot of the rear showing the hand made side panels and oak flooring which houses the amps , electronics, etc. A shot of the rear showing the hand made side panels and oak flooring which houses the amps , electronics, etc. |
 A 42" flat Screen hides in the ceiling and drops with the touch of a button, Add in the PS3 player and its PARTY TIME!! A 42" flat Screen hides in the ceiling and drops with the touch of a button, Add in the PS3 player and its PARTY TIME!! |
 All debugged, tweaked and Ready to go home! All debugged, tweaked and Ready to go home! |
| '52 Buick Woody Station Wagon. Beautiful car that was Recently purchased but riddled with a multitude of electrical Gremlins! |
 |
|||
 AHH the gremlins home base. 3 separate harnesses from different vehicles hacked into this one car. |
 The wiring, after a "bit" of effort! |
 More of the wiring after it was redone. |
 The gremlins have been evicted :-) The gremlins have been evicted :-) |
Click on any photo for a larger view. |
| Pictures of a 69 SS396 Chevelle undergoing a complete restoration. This customer had completely dismantled his high school car. He started by bringing us just the rear end to rebuild. He liked what he received and followed up by bringi ng the entire car in for restoration. Since completion several years ago there have been ZERO problems. |  |
|||
 Acid etched housing ready for reassembly. |
 Rear brake assembly ready for installation. |
 Completely rebuilt rear end ready for another 100,000 miles. |
Click on any photo for a larger view | |
 Acid etched frame ready for paint. |
 Fresh epoxy paint, looking good. |
 Starting the assembly. |
 Suspension in and detailed. |
 All done and waiting on the customer's body shop. |
 Back from the paint shop, now the fun starts Back from the paint shop, now the fun starts |
 Starting the interior install. |
 Detailed rebuilt e-brake assy. |
 Interior's almost done. |
 Remote CD changer and amplifier neatly installed. |
 New 502 Crate in it's new home. |
 A shot from the back. |
 Nice front end shot showing some of the detailing. |
 Almost ready to go home. |
Ready for it's new home. Total project time, about 12 months. |
| Pictures of a 69 GTO getting a firewall forward restoration. Since completion there have been NO ISSUES. (Click photos for larger view.) |  |
|||
 37 years or grease and grime YUK! |
 Can you say road salt? |
 What a Grease ball! |
 Pretty scuzzy. |
 Nice fresh paint. |
 Starting to go back together. |
 A bit cleaner than the shot above. |
 A whole lot cleaner than it was. This by the way was not a rebuild. Just a clean and repaint per the owners request. |
 Looks just like new. |
Ready for delivery. |
| Pictures of a 52 Chevy pickup getting a new firewall, floor pans, Mustang II suspension and motor/trans mounted up. The owner will finish from the project from this point. |  |
|||
 Looking kinda ugly. Looking kinda ugly. |
 Mustang II suspension installed. |
 Out with the old. |
 Where'd the firewall go? Can you say Air conditioning? |
 New firewall tacked into place |
 New rear springs and shocks in place with a grungy old rear end. oh well we're at the mockup stage. |
 Almost ready to go back home. |
 Shot showing engine, steering, and exhaust all fitting nicely. |
 New floorpans installed. |
|
| 1978 Corvette that we performed a "frame on" restoration. The owners originally brought in another car that was too far gone to put any money into. We helped them locate a viable candidate with only 82,000 miles on it and proceeded to do a 496 big block conversion. Since finished, the car has logged over 5,000 miles with zero issues. |  |
|||
 Greasy old 350 ready for retirement. |
 Engine transmission and suspension coming apart. |
 Yuck!!! What a mess. |
 31 years of neglect soon to be corrected. |
 Cleaning up nicely, keep in mind this is a "frame on" restoration. |
 Amazing what some elbow grease and paint will do. |
 Picture showing the newly rebuilt rear end assembly. All new brakes, drive shafts, differential. Not too mention squeaky clean. |
 A pic from the bottom looking forward and up. CLEAN CLEAN CLEAN! A pic from the bottom looking forward and up. CLEAN CLEAN CLEAN! |
 Nicely installed 496 Stroker motor, it dynoed at 620 hp 600 lb ft of torque on pump gas YOWSER! |
 A picture of the motor from the right side. Looks like it came in there from the factory. This thing does nothing but run, no overheating, no leaks, or other issues that can take the enjoyment out of owning a collector car. |
| An original owner 64 GTO Chassis getting a long awaited restoration. It is being updated with front and rear Global west supsension, a Moser 9 inch rear end and Wilwood 4 wheel disc brakes. This car will be completed in stages as the owners finances permit. | ||||
 The chassis almost stripped. Too late to back up now. |
 All blasted, primed, and painted. Ready for the trial assembly. |
 Back from the paint shop and ready for the trial assembly. |
 Trial assembly coming along very nicely with only minor glitches. |
 Trial assembly complete and all fitment issues resolved. Now for final paint on the other components. |
 Final assembly moving along without a glitch. |
 Moser 9" Rear end and suspension in place. |
 Detail shot of lower control arm etc. Detail shot of lower control arm etc. |
 A nice shot showing the front suspension. A nice shot showing the front suspension. |
|
 |
 |
All ready for delivery, the owner is on his way with a trailer :) | ||
| Newly purchased 72 Challenger with front end / stability issues. Inspection reveals collapsed inner fender panel /frame rail. If you think this is scary You ain't seen nothing yet. |  |
|||
 Picture of backside. Note the generous coating of Bondo slathered around as if it was going to help. Nice black paint job. |
 Picture of main frame rail after "kitty hair" was chipped away. NICE WORK! |
 Replacement frame rail and inner fender panel being mocked up and checked for fit. |
 Being tack welded and rechecked. Moving along nicely. |
 Motor's back in front end aligned and almost ready to go home. |
| A '65 Mustang that underwent an extensive firewall forward retsoration due to rust issues. They included a Mustang II front end kit from Heidt's, Vintage air system, a new crate motor from Ford Racing, new tires and wheels, Tilt column, guages, new dash and engine compartment wiring. Since being finished it has been reliable and trouble free. Exactly what we strive for! |  |
|||
 A Ho hum stocker 289, prettied up but hiding a lot of miles. A Ho hum stocker 289, prettied up but hiding a lot of miles. |
 The motors out, now the fun begins. |
 Pic of the new inner fenderwell and Mustang II crossmember in place. |
 All prepped, primed and ready for paint. All prepped, primed and ready for paint. |
 New tilt column installed and steering linkage hooked up. New tilt column installed and steering linkage hooked up. |
 Trial fit with old motor. Trial fit with old motor. |
 New 306 crate from Ford looking like it belongs there. New 306 crate from Ford looking like it belongs there. |
 Wiring and A/C lines being run. Wiring and A/C lines being run. |
 Ready for alignment. Ready for alignment. |
 All tweaked up and ready for delivery. |
Give us a call @ 402-572-0694 NOTE: Press # to bypass recording
Please leave a message if we can't answer
or email us at tandmautomotiveomaha@gmail.com
PLEASE INCLUDE YOUR PHONE NUMBER WHEN E-MAILING
NOTE: If we do not respond within 24 hours check you junk folder or better yet call us.